![Remove the front wheel of the CT125 Hunter Cub. Steps for installing a reinforced damper [Video: Moto Champ TV]](https://motopeek.com/wp-content/uploads/2025/06/2405-1760838694073.jpg)

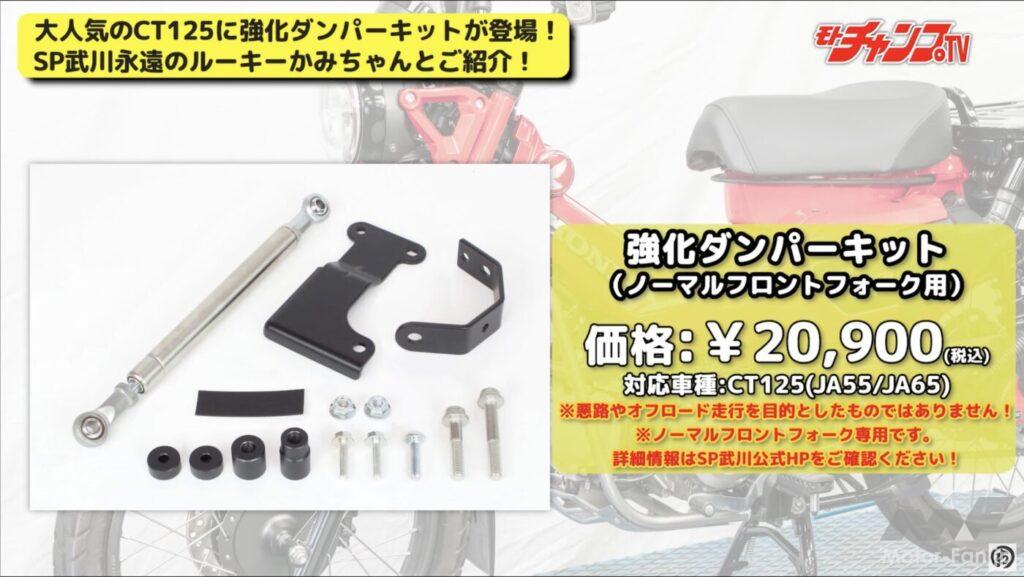
The reinforced damper kit sold by Special Parts Takegawa costs 29,000 yen (tax included).
The Honda CT125 Hunter Cub is popular not only for off-road riding, but also as a base for customization. With a wide variety of tuning parts available, many owners are customizing their bikes in their own way. However, because it’s designed for off-road use, while it offers a comfortable ride, it can sometimes feel lacking for road use. While many people choose aftermarket parts for rear shocks, which are relatively easy to change, removing and installing the front forks is a major undertaking, making many hesitant to do so. The reinforced damper kit from SP Takegawa is a must-have for Hunter Cub owners, as it can be installed not only on the current model JA65 but also on the previous generation JA55. Here’s how to install it.
Remove the front tire

Loosen the front wheel axle shaft and nut.
This time, we have compiled a digest of the video ” Installing an SP Takegawa Reinforced Damper Kit on a CT125 Hunter Cub and Test Ride! ” , which was released on Moto Champ TV , a free video streaming service on YouTube. The replacement procedure begins with removing the front tire. With the bike on the center stand, loosen the axle shaft and nut.
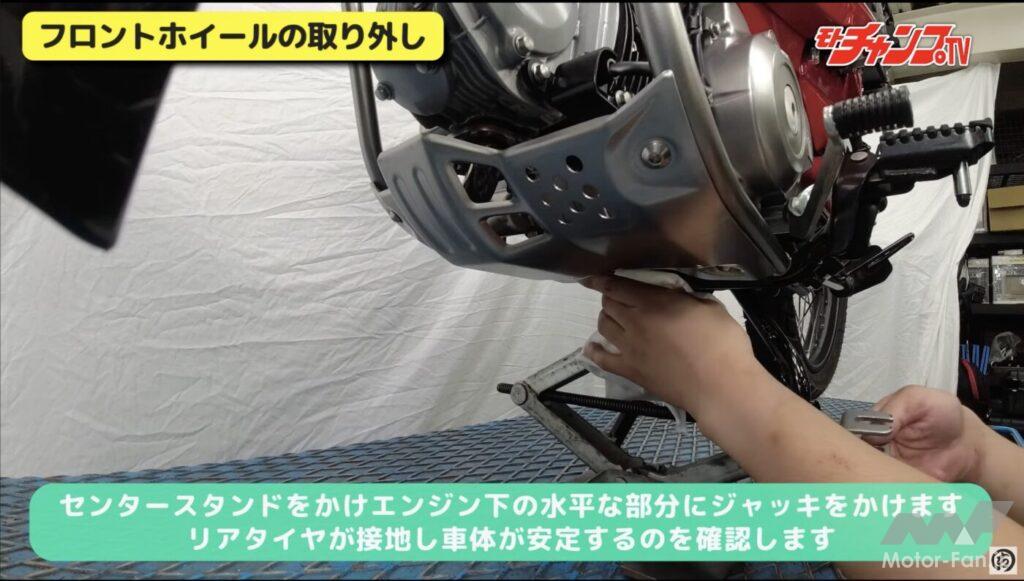
Lift the vehicle using a pantograph jack or similar.
Before removing the axle shaft, lift the vehicle using a jack. In this case, a pantograph jack is used, and the part that touches the vehicle is protected by a cloth. The position where the jack is placed is next to the drain bolt that is removed when changing the oil.
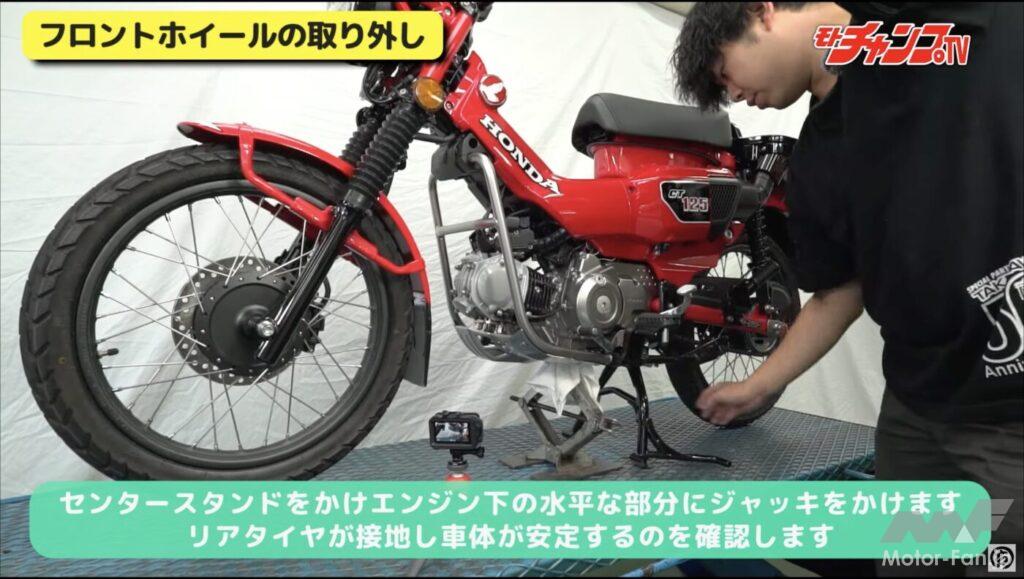
Jack up the car until the rear tires are firmly on the ground.
When using a jack to lift the vehicle, be sure to hold the vehicle with your free hand to prevent it from tipping over. Lift the vehicle up until you can confirm that the front tires are raised and the rear tires are firmly on the ground.

Remove the axle shaft and remove the front tire.
Jack up the car to lift the front tire, then pull out the axle shaft that you loosened earlier. When doing this, don’t hit the shaft too hard, but lift the tire slightly and you should be able to remove it by hand. Once you’ve removed the shaft, remove the tire by pulling it forward. Be careful not to drop the collar that’s stuck into the hub.
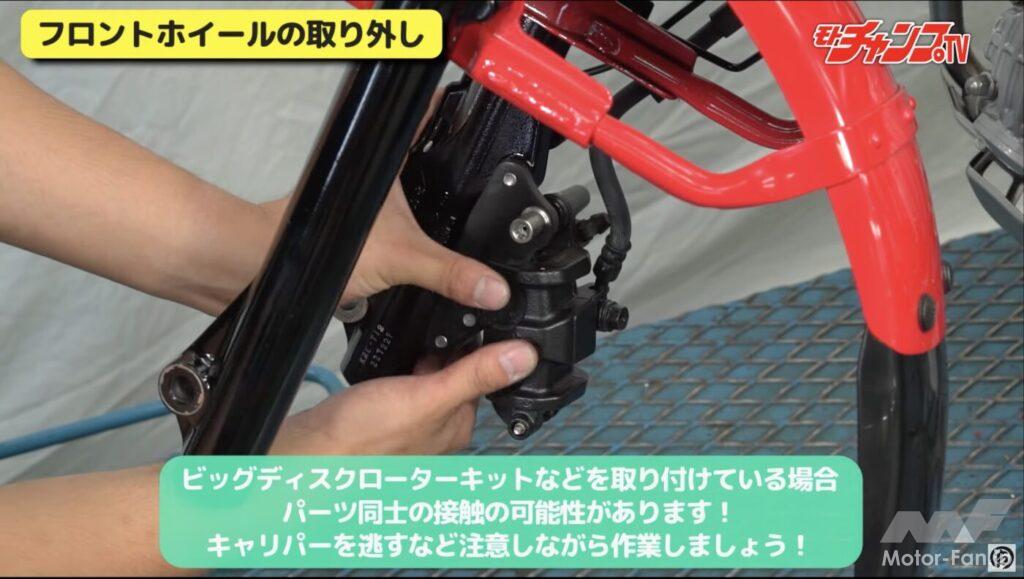
If you have changed the disc rotor, it will come into contact with the wheel, so it is a good idea to press the caliper to release it.
If you have a larger diameter front disc rotor, it may come into contact with the caliper when removing or installing the tire, which could cause scratches. In this case, you can prevent scratches by pushing the caliper outward with your hand beforehand.
Install the lower damper stay
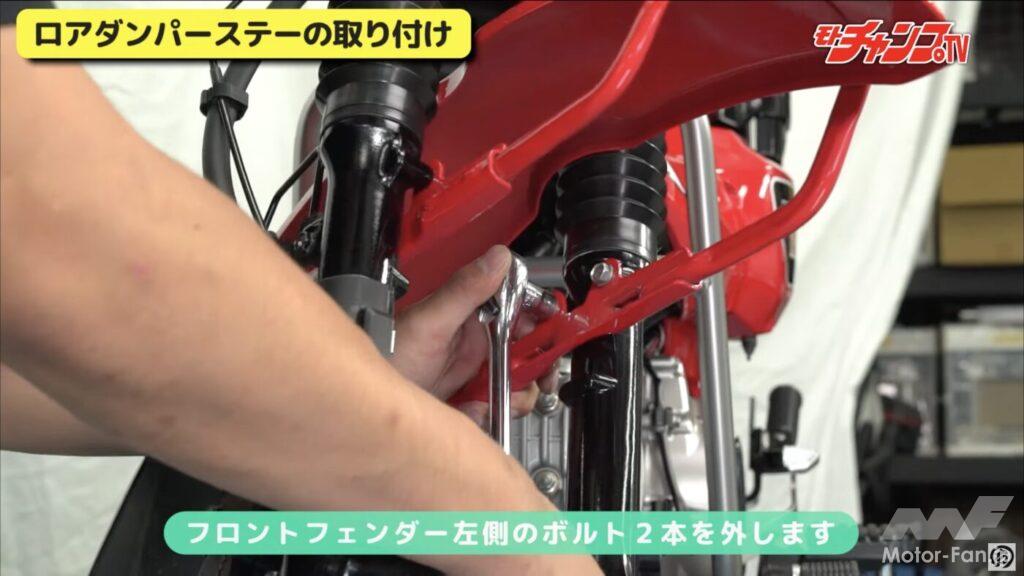
Remove the two bolts holding the fender in place.
The lower damper stay is required when installing the reinforced damper below. To install this, first remove the two bolts on the left side that connect the front fender to the fork.
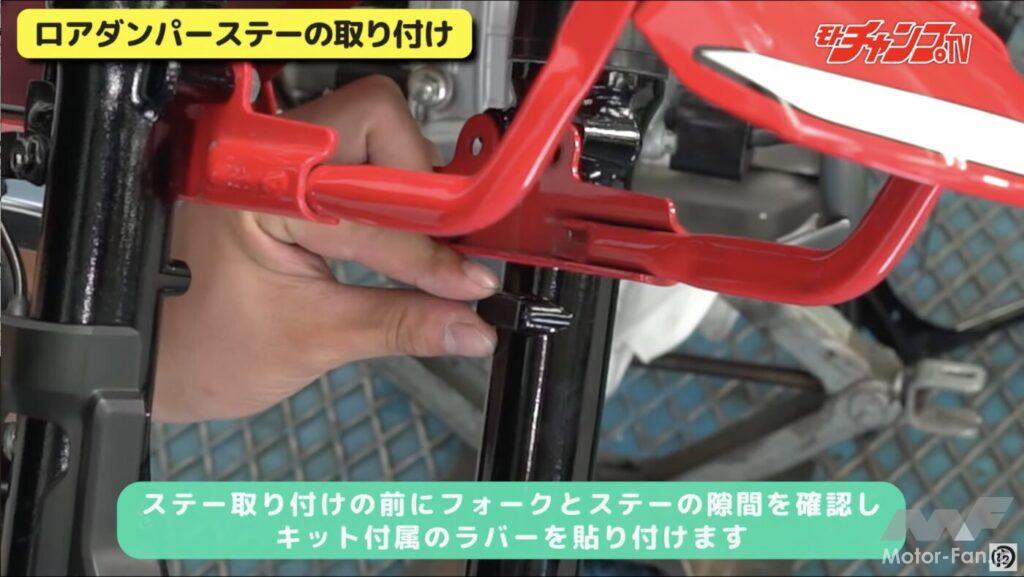
Glue the rubber included in the kit to the protrusion under the fender stay.
Before installing the lower damper stay, attach the rubber provided with the kit to the protrusion under the fender stay. This will act as a buffer between the lower damper stay and the fork.
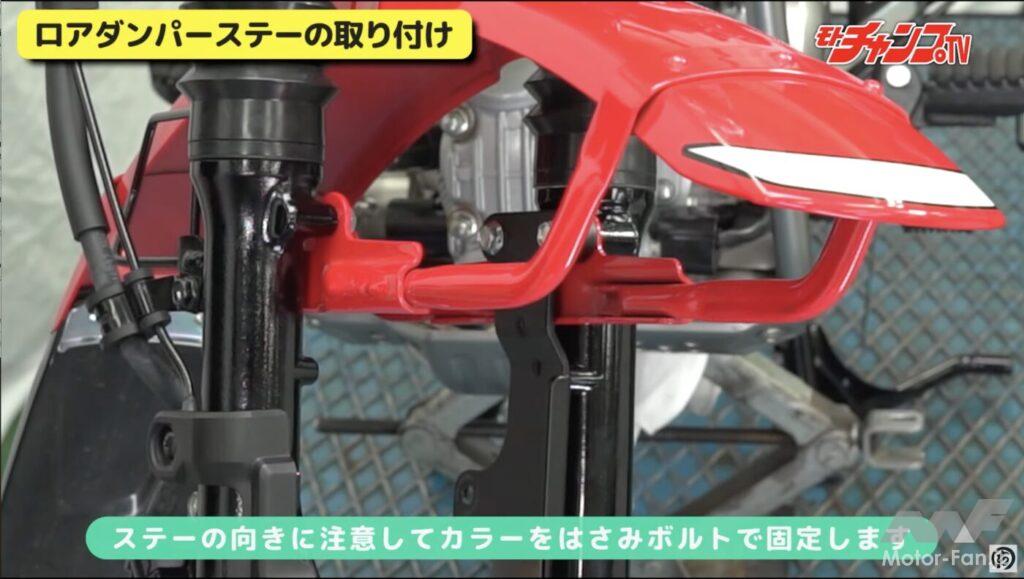
Secure the lower damper stay.
Reuse the removed bolts to attach the lower damper stay. Don’t forget to tighten them firmly to the specified torque.
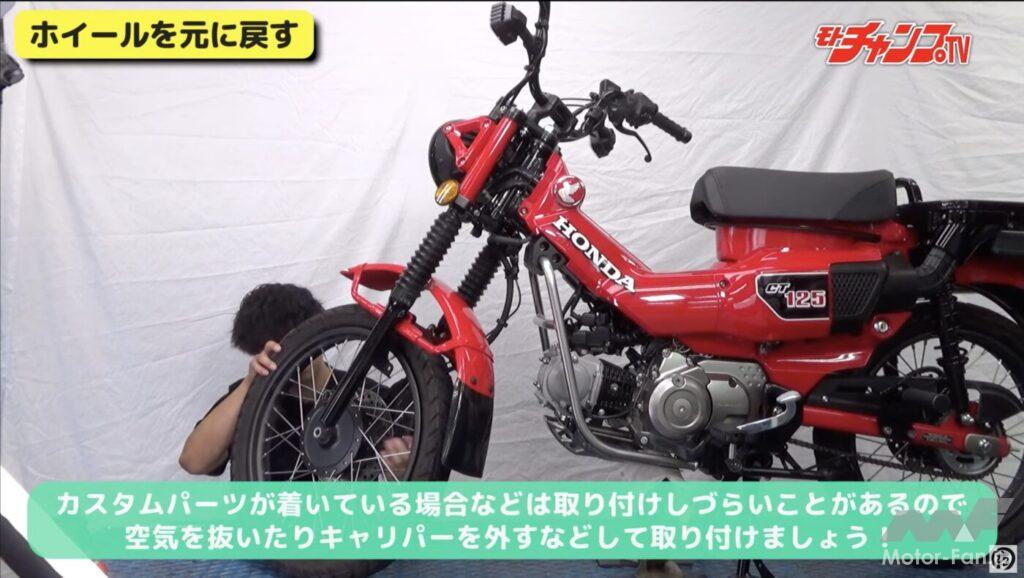
Put the front tire back on.
Once the lower damper stay is attached, put the front tire back in place. Install the tire while making sure that the disc rotor is firmly seated between the disc caliper pads, and temporarily fasten the axle shaft and nuts. After that, lower the jack to place the vehicle on the ground, and then tighten the axle shaft and nuts to the specified torque.
Install the upper damper stay
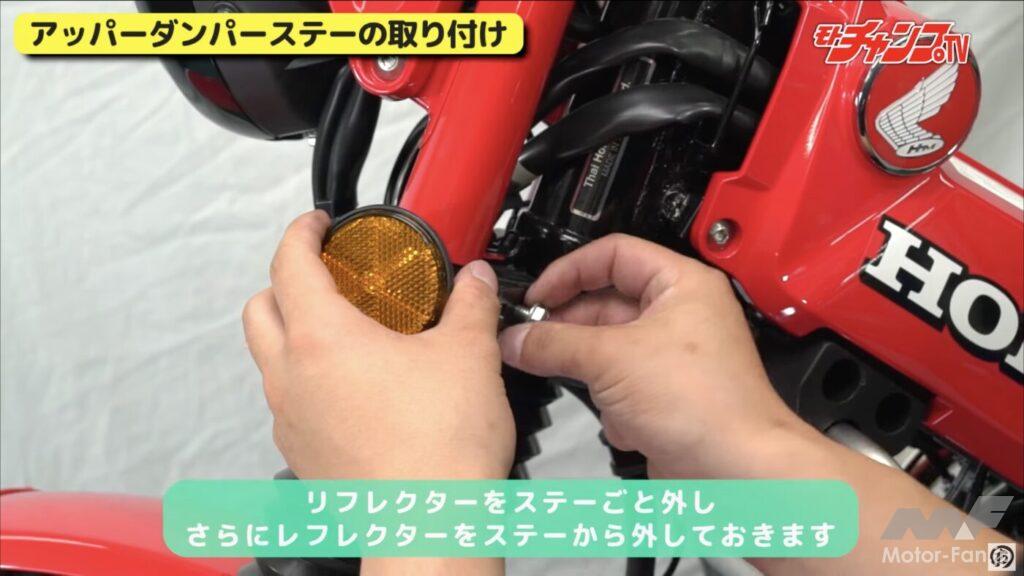
Remove the left reflector along with the bracket.
The upper damper stay is used to attach the upper part of the reinforced damper, and like the lower damper, it is included in the kit. First, remove the reflector and stay attached to the left front fork.
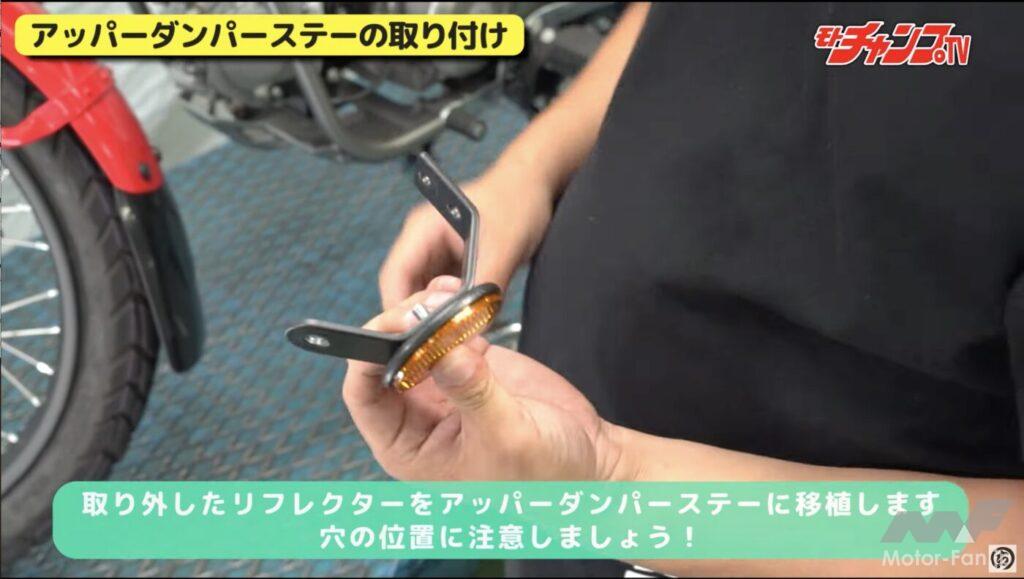
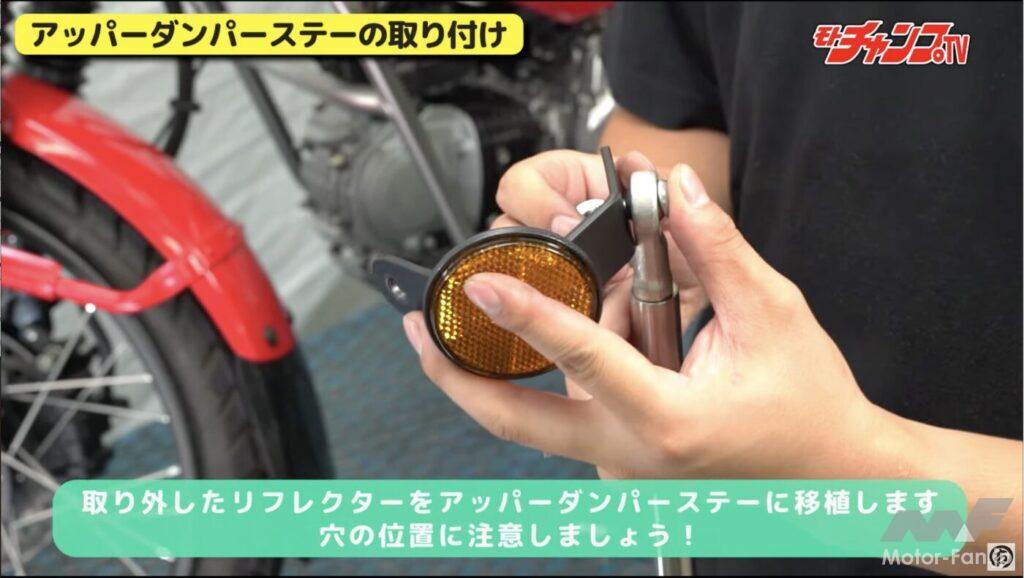
Remove the reflector from the bracket and transplant it to the bracket included in the kit.
After removing the reflector along with the stay, disassemble the stay and reflector. Next, attach the disassembled reflector to the upper damper stay included in the kit. Pass it through the center of the multiple holes and secure it in place using the nuts removed from the original stay.
Attach the damper to the stay.
Next, attach the reinforced damper to the upper damper stay. Make sure the case side is facing up and secure it with the bolts and nuts included in the kit. If you attach the damper after the upper damper stay has been attached to the fork, you will not be able to attach it, so it should be attached at this point.
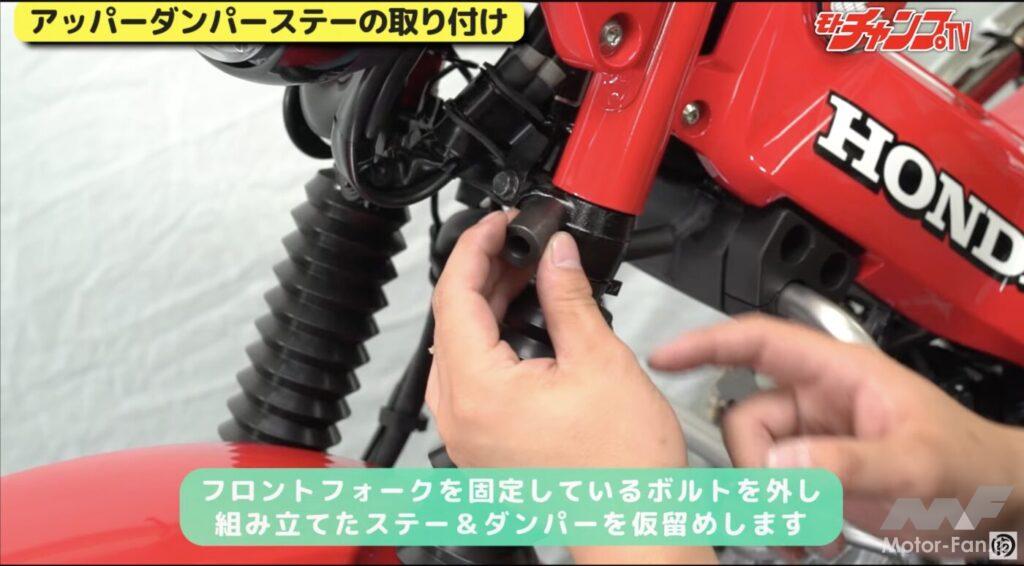
Remove the bolt above the left fork rubber cover and secure the damper stay using the collar included in the kit.
Remove the bolts above the rubber cover of the fork and secure the collar included in the kit (the one being held in the photo above) by clamping it between the upper damper stay. The removed bolts are not long enough, so secure them with the long bolts included in the kit.
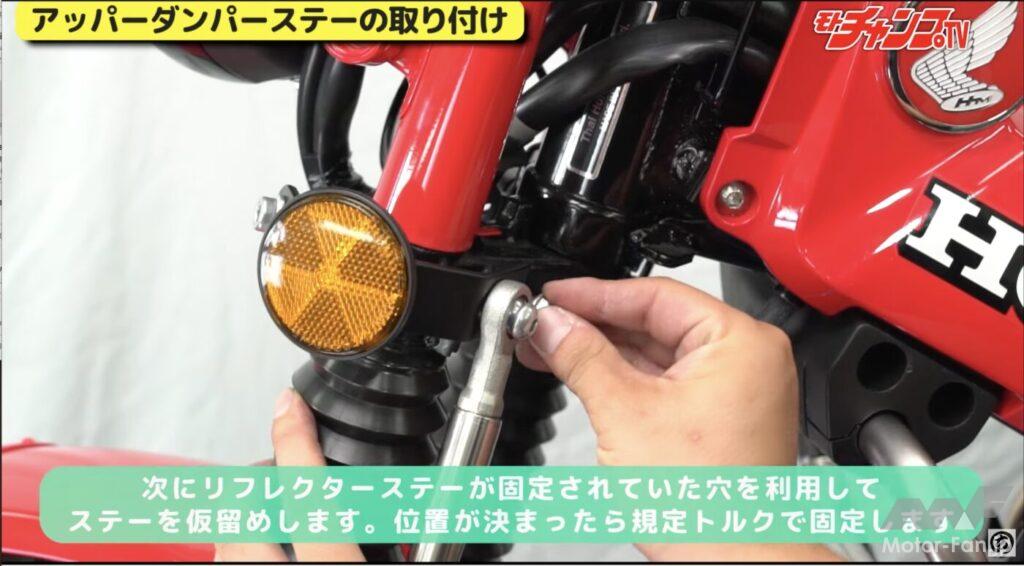
Secure the damper stay to the hole in the reflector stay using the screws removed from the damper stay.
Reuse the bolts that secured the reflector stay that you removed first to secure the rear of the upper damper stay. After properly positioning it, tighten each bolt to the specified torque.
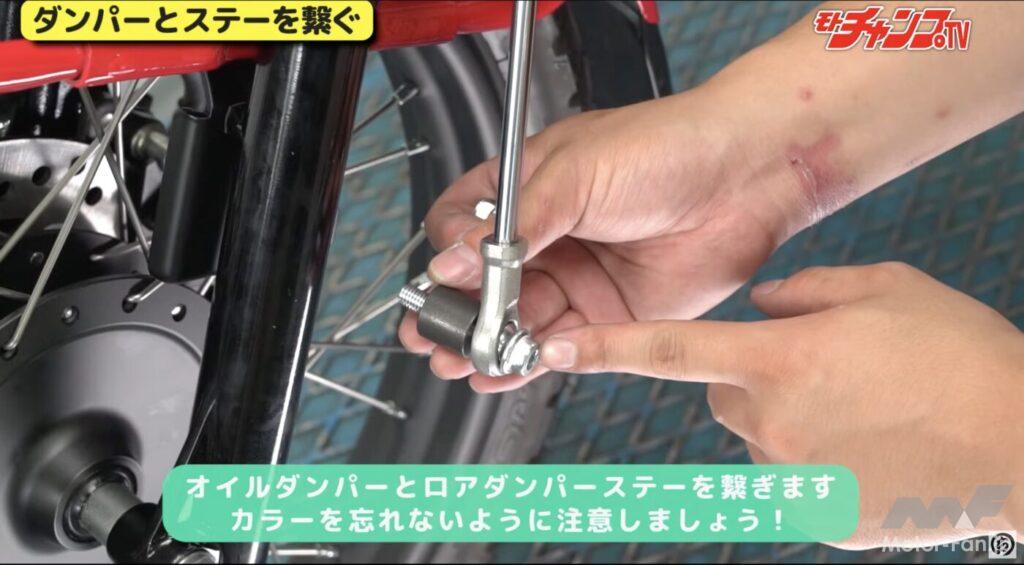
Secure the bottom of the damper to the stay using the long bolts and collars included in the kit.
Finally, secure the bottom of the damper to the lower damper stay. This should also be done using the long bolts, collars, and nuts included in the kit. This completes the installation procedure.
How did it feel when you tried it out?
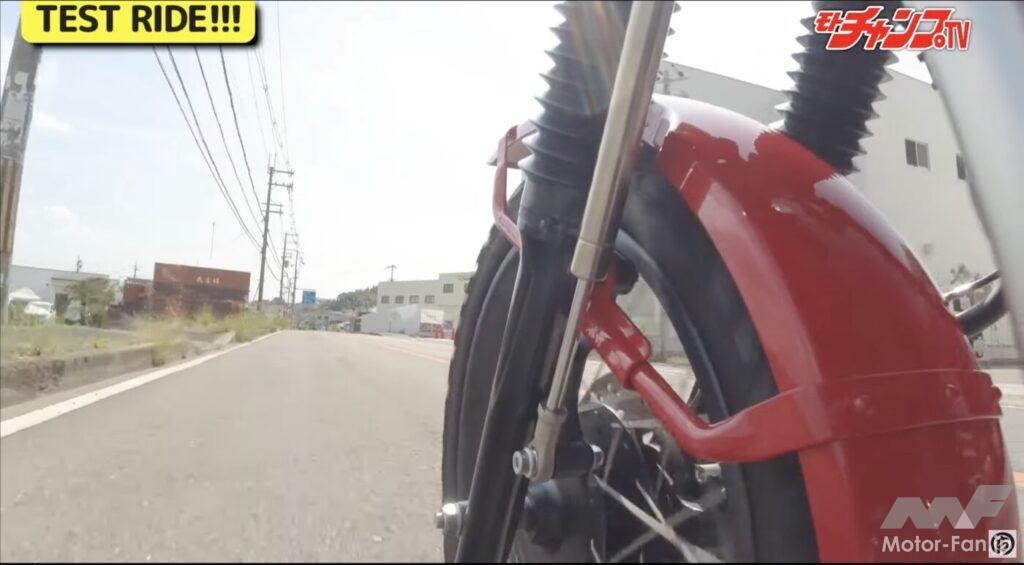
The effect will be apparent as soon as you start test driving.
If the installation procedure involves pressing down on the front caliper pads, make sure to operate the brake lever firmly before starting off to ensure that the pads and rotor are in contact. Before starting off, put your weight on the front to lower it, and you’ll feel the effect at this point. The stock softness is completely transformed into a supple, moderate damping. The effect is immediately noticeable once you start driving, with the bike smoothly following bumps in the road and going over manholes. Even with the throttle wide open and weight applied to the rear, there is minimal lift at the front, and the feeling of contact with the ground is never lost. In other words, it transforms the ride quality to feel like a whole class upgrade. This is a must-have product for CT125 owners!