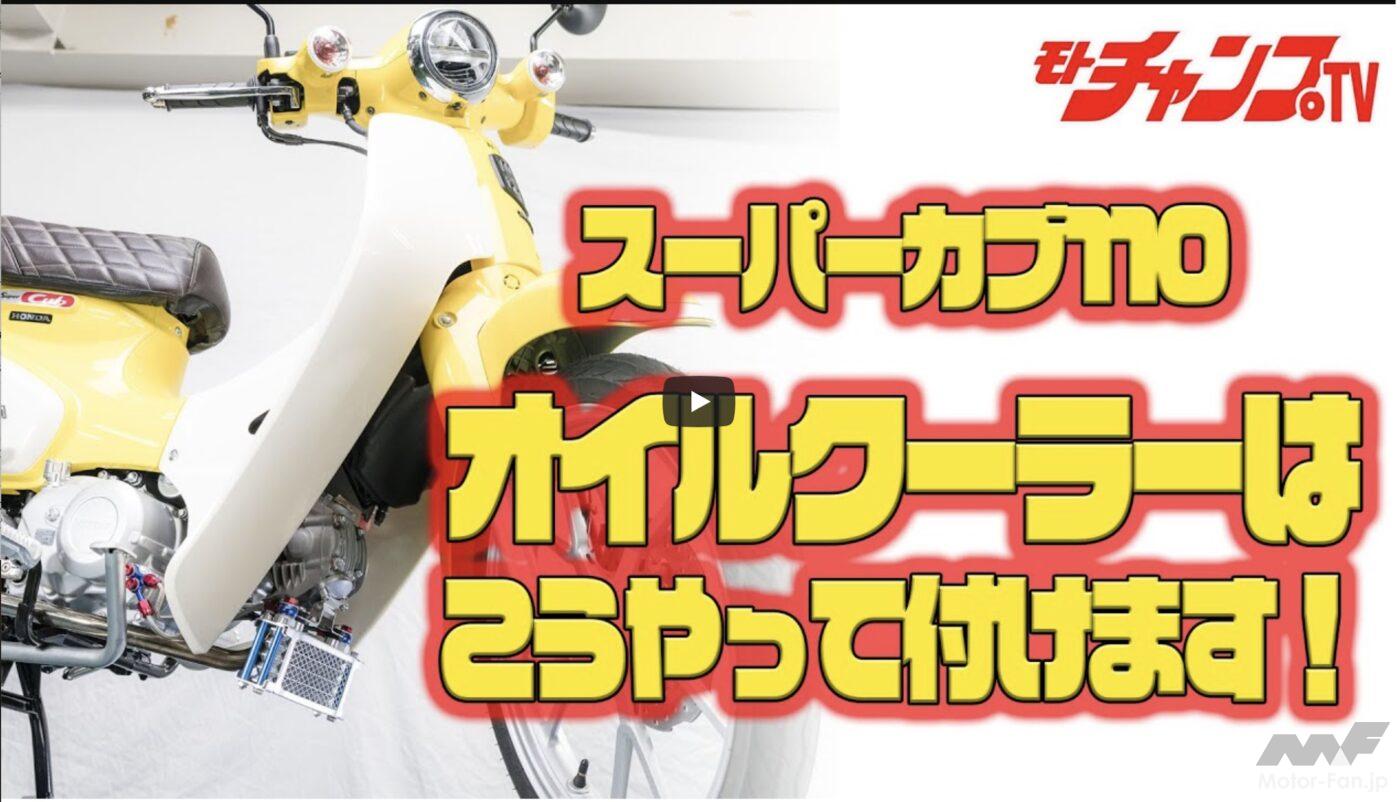
![How to install an SP Takegawa oil cooler on a Super Cub 110! [Video: Moto Champ TV]](https://motopeek.com/wp-content/uploads/2024/09/4376-1760974480653.jpg)
Everyone knows the importance of engine oil, but air-cooled engines require especially strict maintenance. Unlike water-cooled engines, which use a radiator to cool the coolant, air-cooled engines are cooled solely by oil, so oil deterioration has a major impact on the condition of the engine. For example, the Super Cub 110’s engine oil change cycle is set at every 3,000 kilometers. However, in the summer or if the bike is used continuously at high speeds, you’ll want to change the oil more frequently. This is because engine oil deteriorates rapidly when its temperature exceeds 120 degrees, and it is no longer able to maintain its necessary lubrication performance. Stock engines, of course, require oil changes even more frequently, especially if the engine has been bored out.
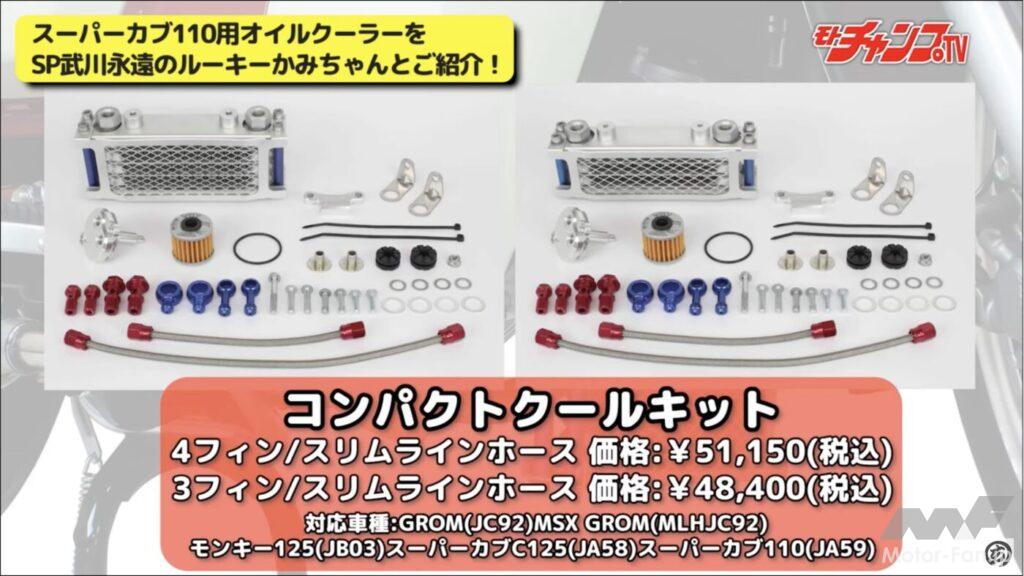
Install the Compact Cool Kit sold by SP Takegawa.
That’s why you’ll want to install an oil cooler. It’s a part that keeps the oil temperature from rising by allowing the airflow from riding to cool the oil. If the oil temperature doesn’t rise, the oil change interval can be extended, and more importantly, engine trouble can be avoided. In this article, we’ll show you how to install an oil cooler by summarizing an episode of ” Moto Champ TV ,” a free video available on YouTube, titled ” We’ll show you why your Super Cub needs an oil cooler! “
Remove the original oil filter
It is possible to do this without removing it, but this time we will remove the leg shield to do the work.
The kit we will be installing this time is the Compact Cool Kit from SP Takegawa. This product comes with not only the oil cooler but also an oil outlet that is attached to the engine, banjo bolts, hoses, and other accessories. The oil cooler itself is available in 3-fin and 4-fin versions, but we will be using the 3-fin version this time. It can be installed with the leg shields still attached, but it is better to remove them for easier installation.

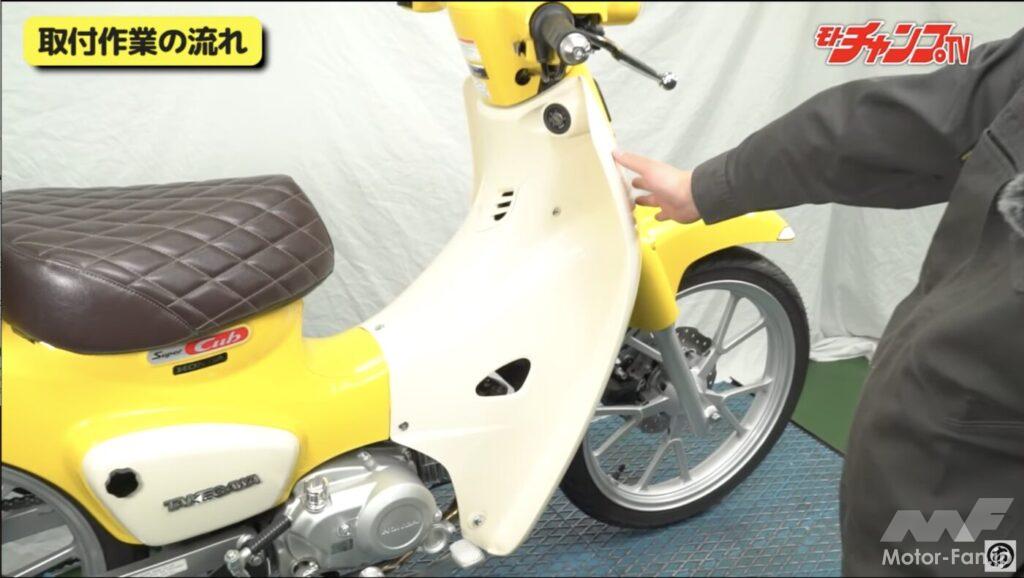
Remove the leg shield while protecting it with masking tape.
After removing the front cover and center cover, remove the seven bolts and push the leg shield up to remove it. At this time, if you apply masking tape around the headlight case and side covers, it will help prevent scratches when removing the leg shield.
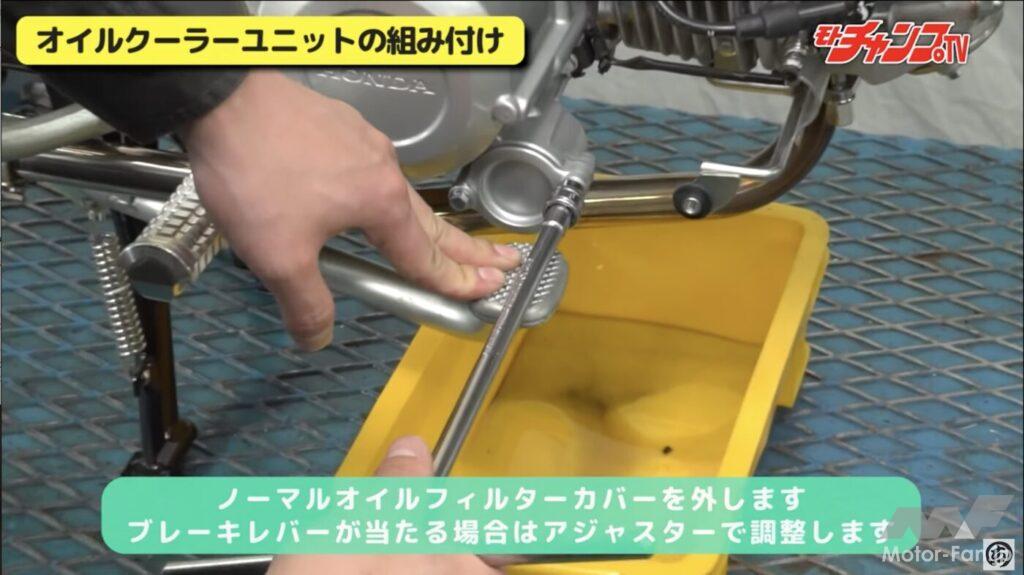
While depressing the brake pedal, remove the oil filter cover.
The oil filter cover is secured to the bottom front of the crankcase on the right side of the engine with two bolts. This needs to be removed, but sometimes the brake pedal gets in the way and you can’t use tools. In that case, loosen the adjustment nut on the rear brake side and the brake pedal will be able to lower sufficiently. The cover can be removed by removing the two bolts, but engine oil will drip out at this time, so have a pan underneath ready to catch it.

Remove the spring and filter from inside the cover.
When you remove the cover, you will find the oil filter and the fixing spring inside. We won’t be using the spring in this kit, so keep it and remove the old oil filter. Dripping oil will stain the brake pedal, so don’t forget to wipe it off after work.
Oil cooler unit installed
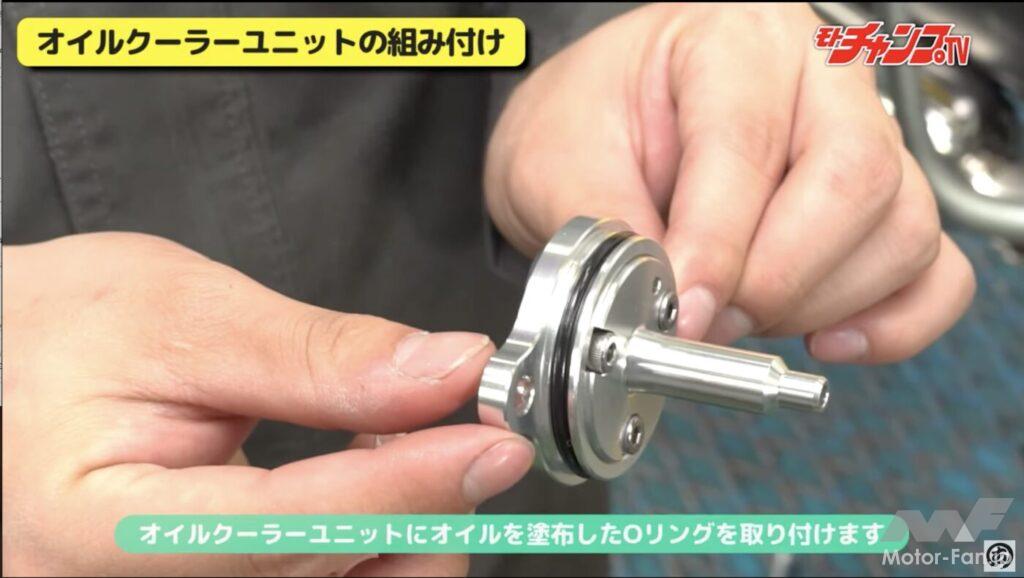
Attach the O-ring to the oil cooler unit included in the kit.
We will be using the oil cooler unit with an oil outlet that comes with the kit, so keep the original oil filter cover. Attach the O-ring to the oil cooler unit, but don’t forget to apply engine oil to the O-ring.
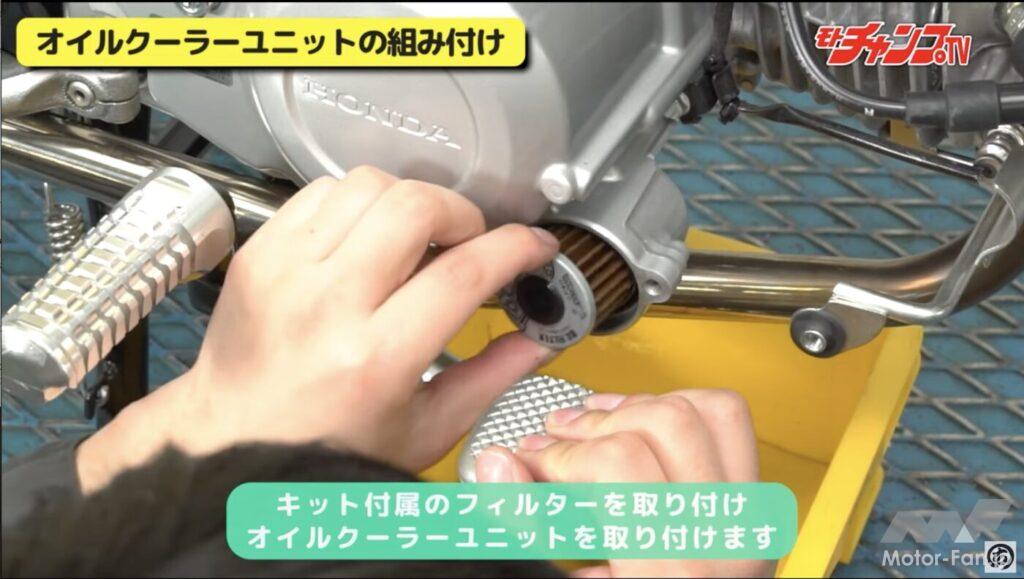
Insert the oil filter included in the kit.
Insert the oil filter that came with the kit and discard the old filter. You don’t need to worry about the orientation of the filter. When inserting it into the engine, it’s easier to work if you hold down the brake pedal with your hand.

Install the oil cooler unit.
Insert the protruding part of the oil cooler unit into the oil filter hole and push it toward the engine. You will need to apply a little force due to the reaction force of the O-ring. Then tighten the bolts included in the kit to the specified torque.
Attach fitting parts

Temporarily fasten the banjo bolt to the oil cooler.
Attach the banjo bolt included in the kit to the oil cooler side. Prepare sealing washers on the top and bottom of the banjo and temporarily fasten it by sandwiching it with the bolt. Then, attach it to the outlet port on top of the oil cooler. Here too, it is fine to just temporarily fasten it as far as you can turn it by hand.
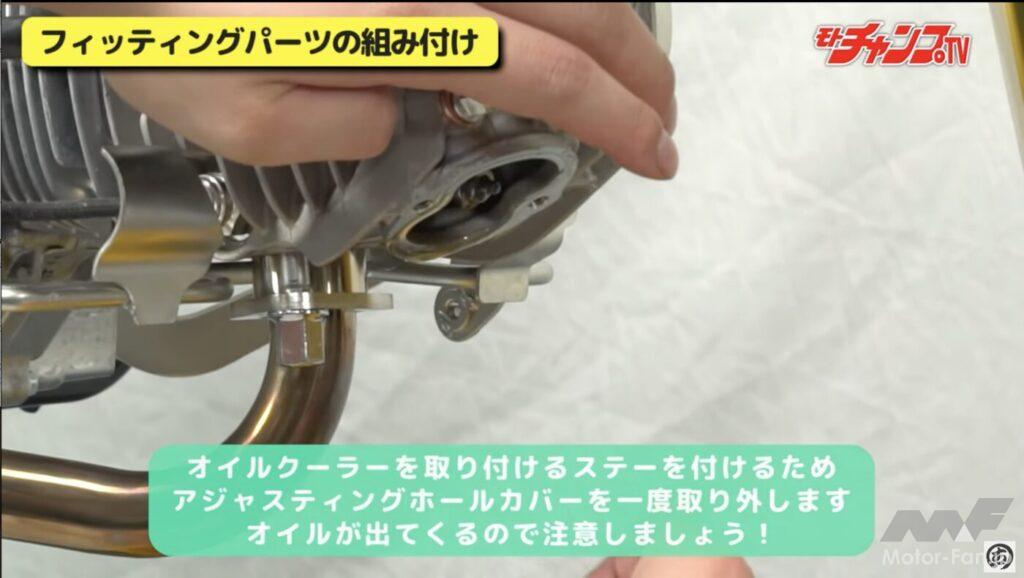
Remove the adjusting hole cover.
Remove the adjusting hole cover under the cylinder head and attach a bracket to secure the oil cooler. When removing the adjusting hole cover, oil may drip, but in this case, there was almost no dripping.
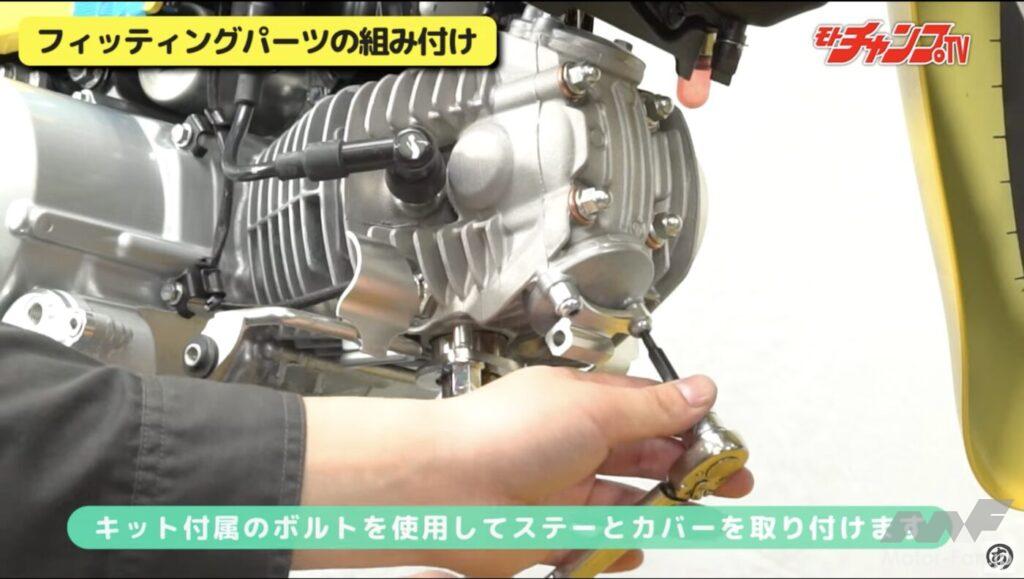
Tighten the adjusting hole cover and the stay included in the kit together.
Align the bracket that comes with the kit with the adjusting hole cover, and return it to the engine side using the bolt that also comes with the kit. Tighten it to the specified torque.
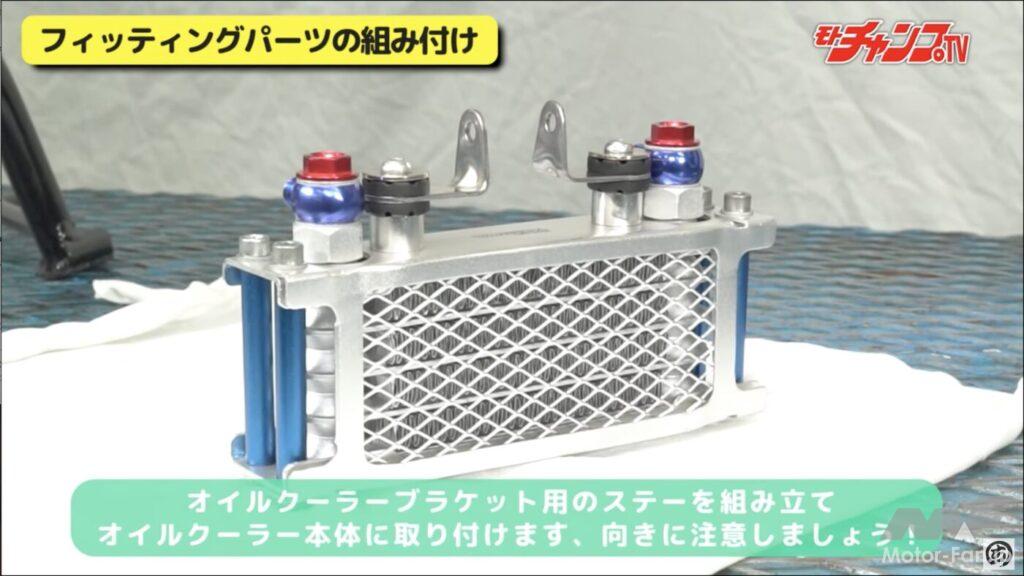
Attach the bracket stay to the oil cooler.
Assemble the bracket stay to attach the bracket to the oil cooler body. Insert the rubber into the L-shaped stay and insert the round stay from above. In this state, secure the bracket stay into the hole on the inside of the banjo bolt of the oil cooler. Make sure the L-shaped stay is facing inward.
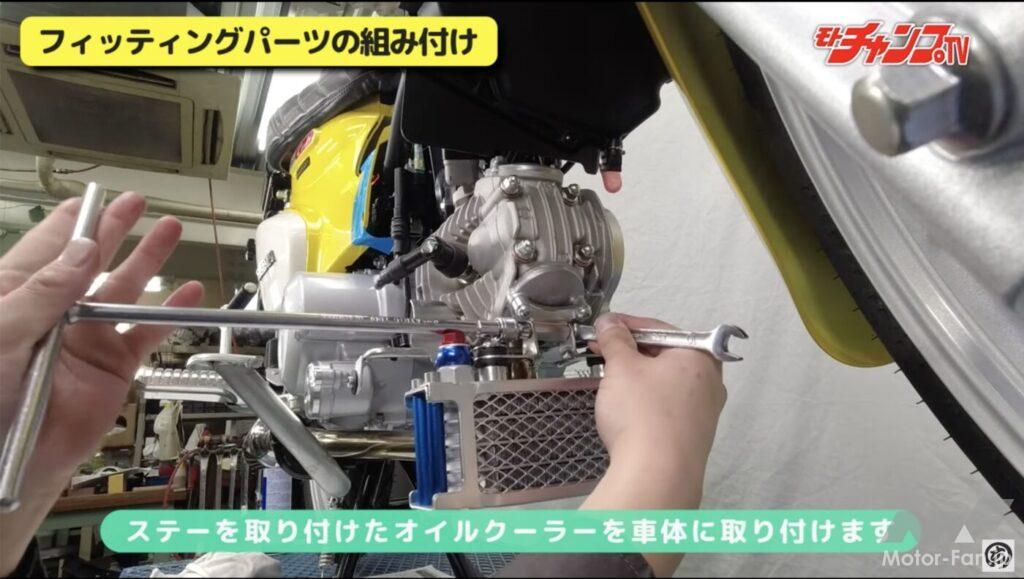
Align the bracket stay attached to the adjusting hole cover with the bracket stay and secure with bolts and nuts.
Once the oil cooler bracket is attached, align it with the bracket attached to the adjusting hole cover and secure it in place. Use the special bolts and flange nuts included in the kit to attach it here as well. Tighten them to the specified torque with the oil cooler facing straight down.
Connect the Slimline hose

Connect the Slimline hose to the banjo bolt.
Once you have temporarily fastened the banjo bolt to the outlet on the engine side as well as the oil cooler, it’s time to connect the Slimline hose. The nut-shaped part at the end of the hose can be temporarily fastened to the banjo bolt by hand. Be sure to consider how you will route the hose as you work.
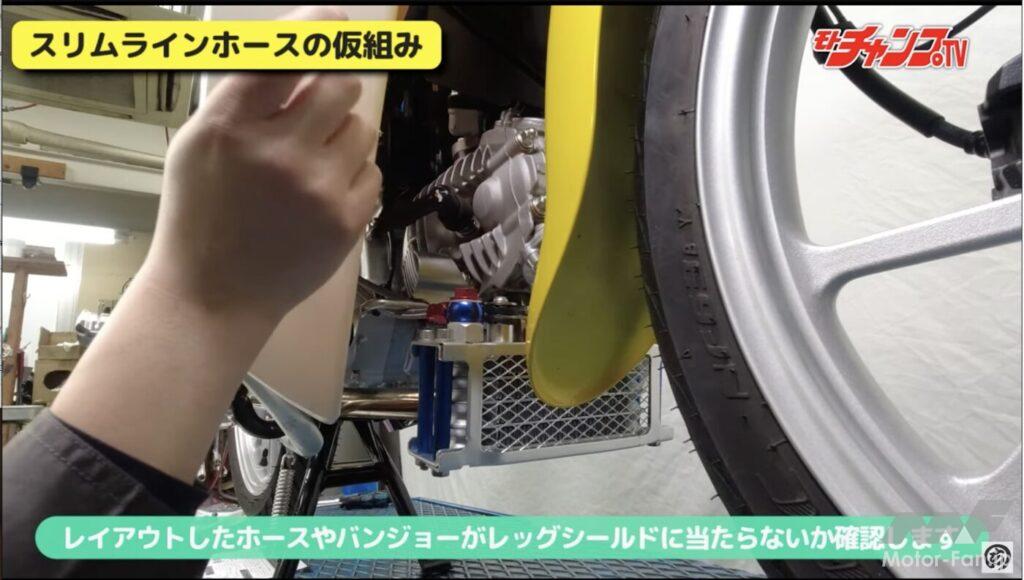
Place the leg shield on and check that it does not interfere with hoses or other parts.
Once both Slimline hoses are connected, return the leg shield to its original position and check that it is not interfering with the hoses, etc. If there is any interference, change the routing of the hoses or adjust them so that they are not interfering with the leg shield.
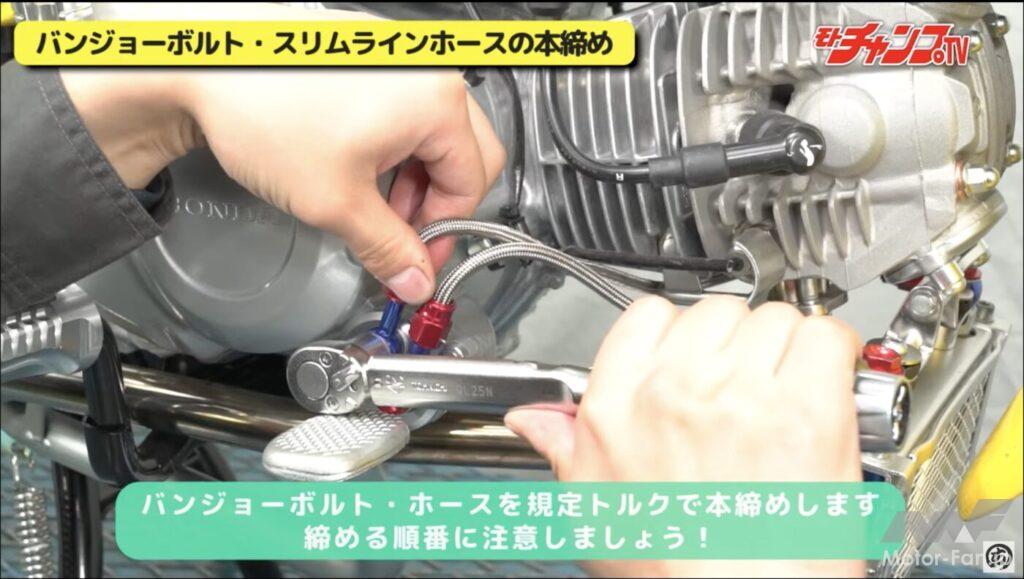
Tighten the banjo bolt and hose to the specified torque in a position where they do not interfere with each other.
Once you’ve finished adjusting the hose, remove the leg shield again and fully tighten the banjo bolt and Slimline hose. The bolts and hoses will move when you tighten them, so be sure to hold them in place with your hands and tighten them using a tool. The bolt and hose on the engine outlet must be tightened on the left before you can tighten the right side, so be sure to work in the correct order.
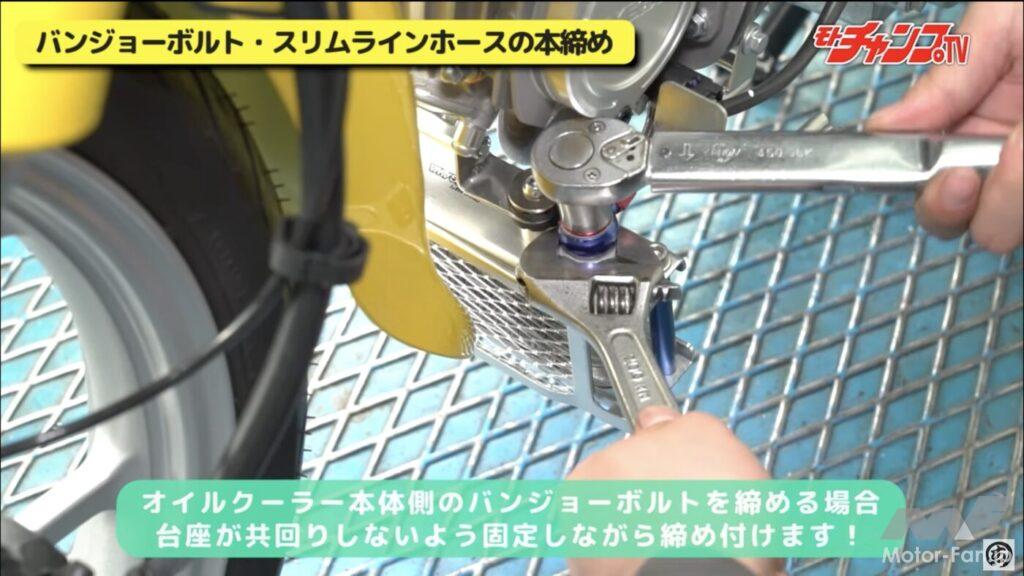
Tighten the oil cooler side to the specified torque.
Once the bolts on the engine side have been fully tightened, tighten the bolts on the oil cooler side as well. The specified torque is listed in the SP Takegawa manual, so be sure to use a torque wrench to tighten them.
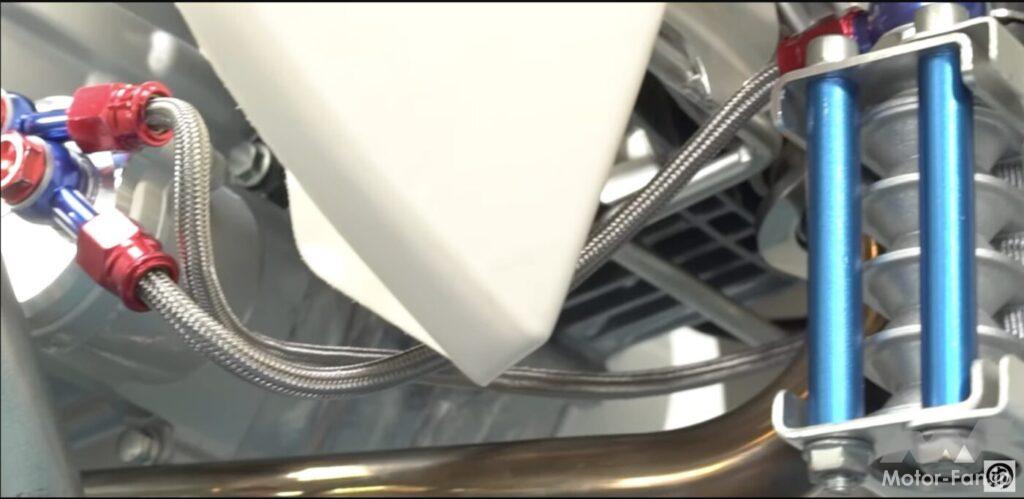
There is no set position for handling.
Once you put the leg shield and front and center covers back on, the work is complete. The hoses are routed as shown in the photo above, but there are no set rules. It would be fun to arrange them to your liking and create a showy effect.