![Even beginners can do it: Make your XSR125 fenderless! [Video: Moto Champ TV]](https://motopeek.com/wp-content/uploads/2025/07/2255-1760836337264.jpg)


SP Takegawa’s fender eliminator kit and LED turn signal kit are installed.
The Yamaha XSR125 is a popular 2-stroke moped model with a retro style. While it already has a stylish design, its looks can be further improved by installing LED turn signals and eliminating the rear fender. A variety of aftermarket parts are available from various companies, but here we will introduce the installation steps for a kit that even beginners can easily install. This is a digest of a video posted on the YouTube channel ” Moto Champ TV ” titled ” Turning the XSR125 fenderless! The taillights and turn signals are also completely renewed with SP Takegawa parts! ” The parts used are the “Fender Eliminator Kit” and “Streamline LED Turn Signal Kit” from SP Takegawa.
Remove the headlights and turn signals
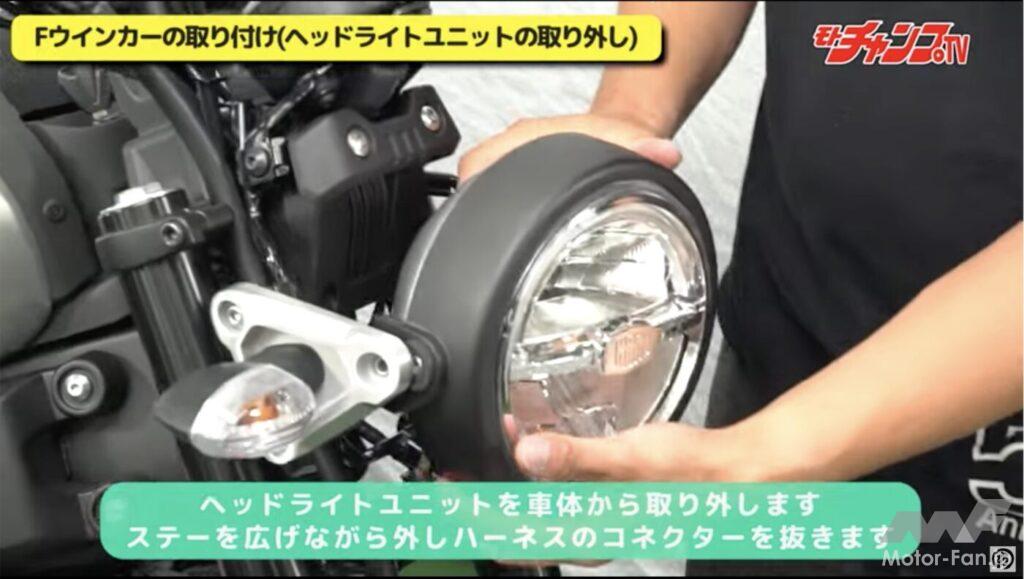
Remove the three bolts from the left, right and bottom to remove the headlight unit.
Start with the front. To change the turn signals, you need to remove the headlight. The headlight is secured with three bolts, one directly below and one on each side, so remove all three. The bottom bolt is a 10mm hex bolt, and the left and right bolts are 5mm hex bolts, so make sure you have the tools ready beforehand.
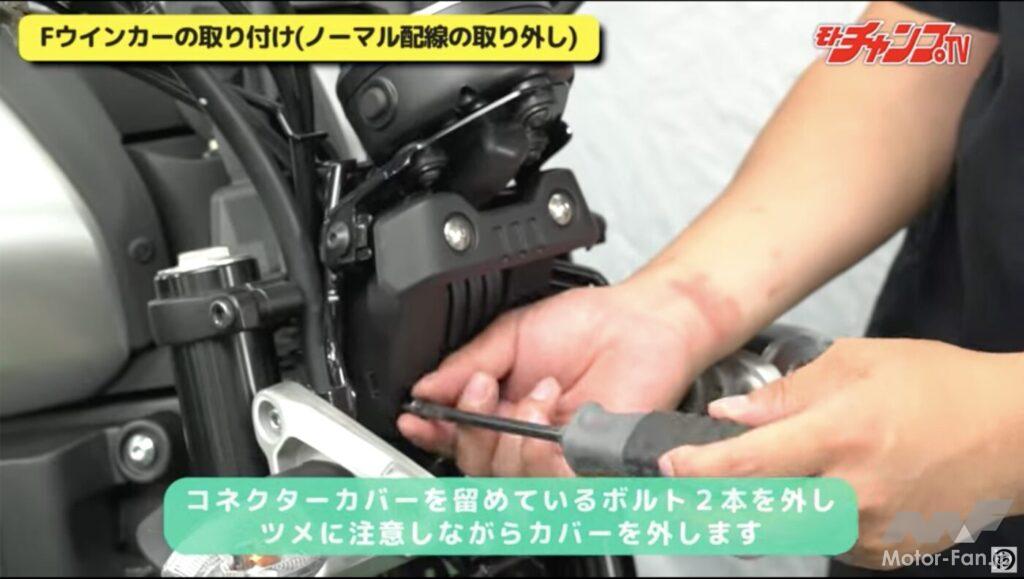
Remove the connector cover behind the headlight.
After removing the three bolts, spread the turn signal stays to remove the headlight and unplug the connector. Next, remove the connector cover on the back of the headlight. After removing the two bottom Phillips screws, spread the cover to the left and right to release the hooks.
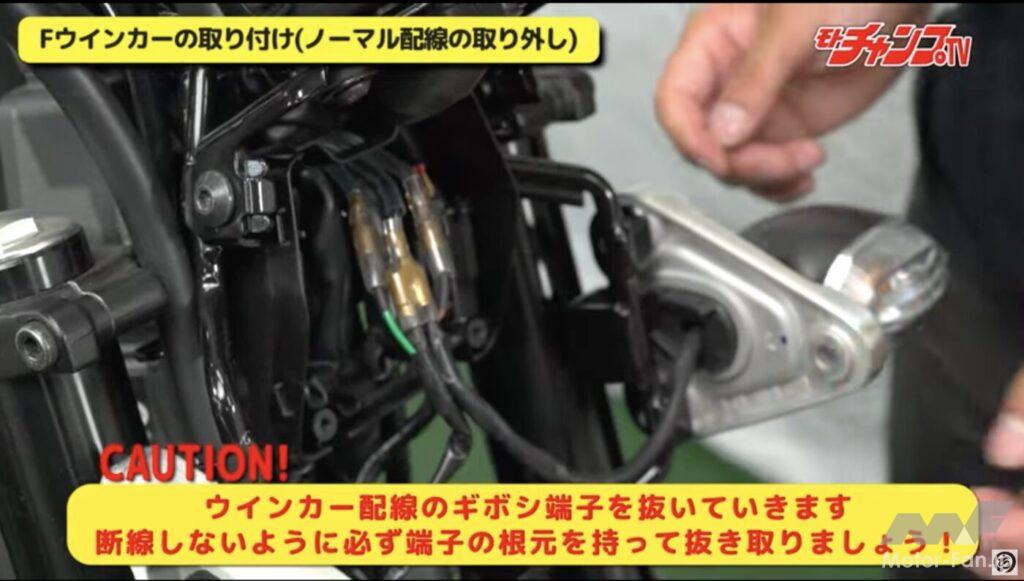
Remove the Gibushi terminals connected inside the cover.
The turn signal harnesses are connected inside the cover. There are four harnesses, each for the positive and negative wires of the left and right turn signals. Remove all the harnesses, but be careful not to pull on the harness wires themselves. This may cause a break inside, so it is best to expose the terminals from the cover and remove them by pinching the terminals.
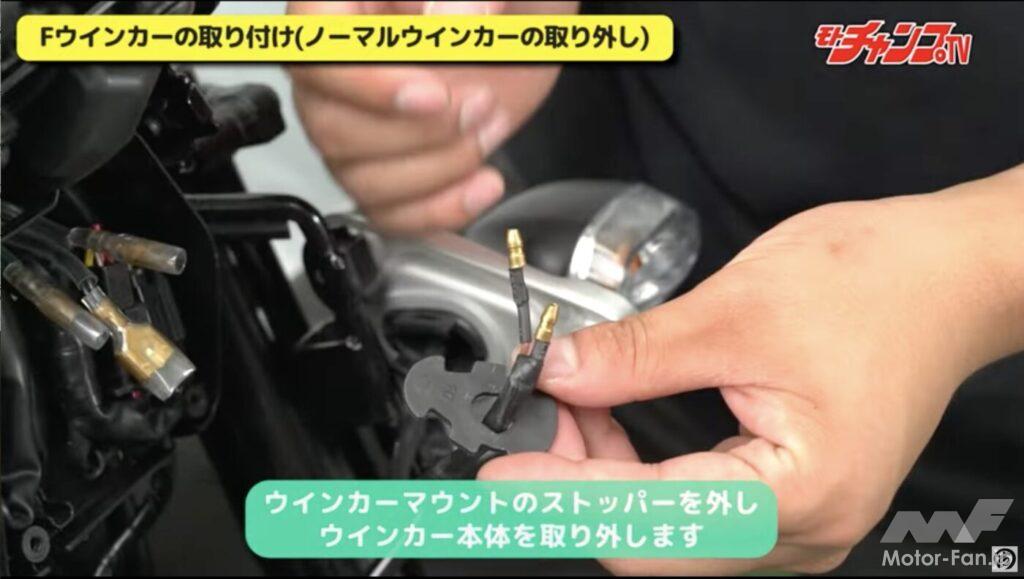
To remove the front turn signal, remove the stopper that acts as the cover on the back and pull it out.
After removing the harness, remove the turn signals from the left and right. They are supported by a plastic stopper on the inside of the stay, so remove the stopper while spreading the surrounding rubber. If you push the rubber part further outwards, you can pull out the turn signal itself.
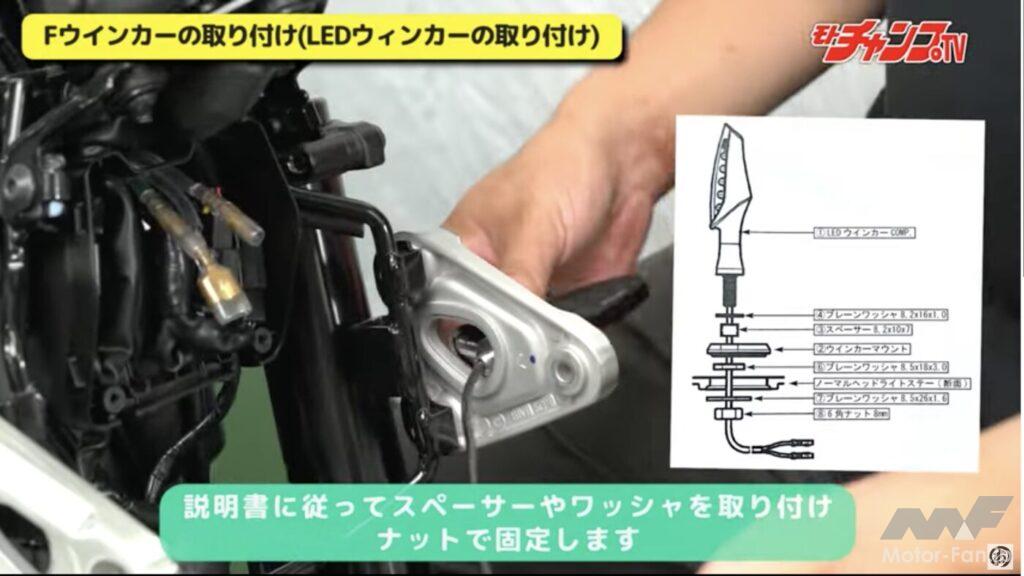
Fix the turn signals according to the kit’s instructions.
For the LED turn signals in the kit, follow the instructions in the manual to pass the washers, spacers, mounts, etc. through the harness and secure them to the bracket. Make sure the mount is securely inside the bracket, then tighten the nuts.
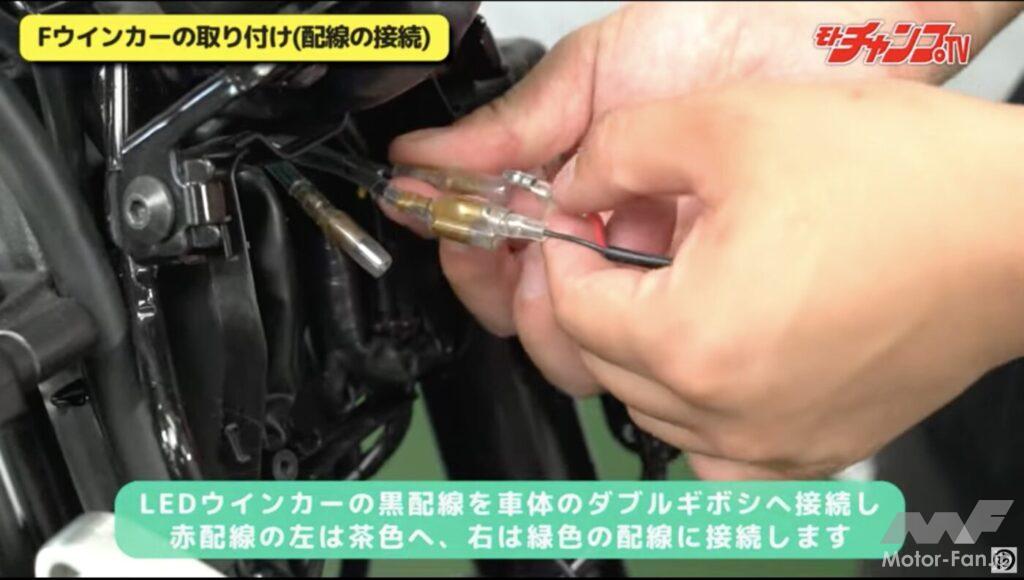
Connect the turn signal wires, put the cover back on, and put the headlight back in place in reverse order.
Once you have installed the LED turn signals on both sides, finally connect the harness. The black wires on both sides are negative, so connect them to the genuine double connectors. Connect the red wire coming out of the left side of the LED turn signal to the genuine brown wire, and then connect the remaining green wire on the right side. This completes the replacement work, so put the connector cover and headlight back in place in the reverse order.
Remove the original fender
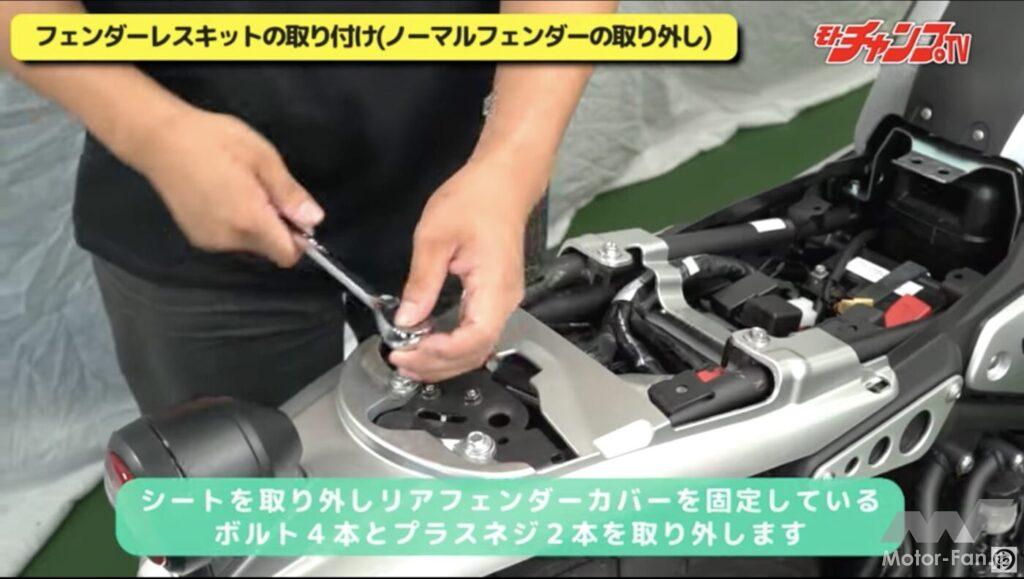
Remove the seat and remove the four bolts and two Phillips screws holding the cowling in place.
The fender eliminator kit and LED turn signals will be replaced at the same time. First, remove the seat, then separate the tail cowl from the frame. After removing the Phillips head screws on the front left and right, remove the four 10mm head bolts.
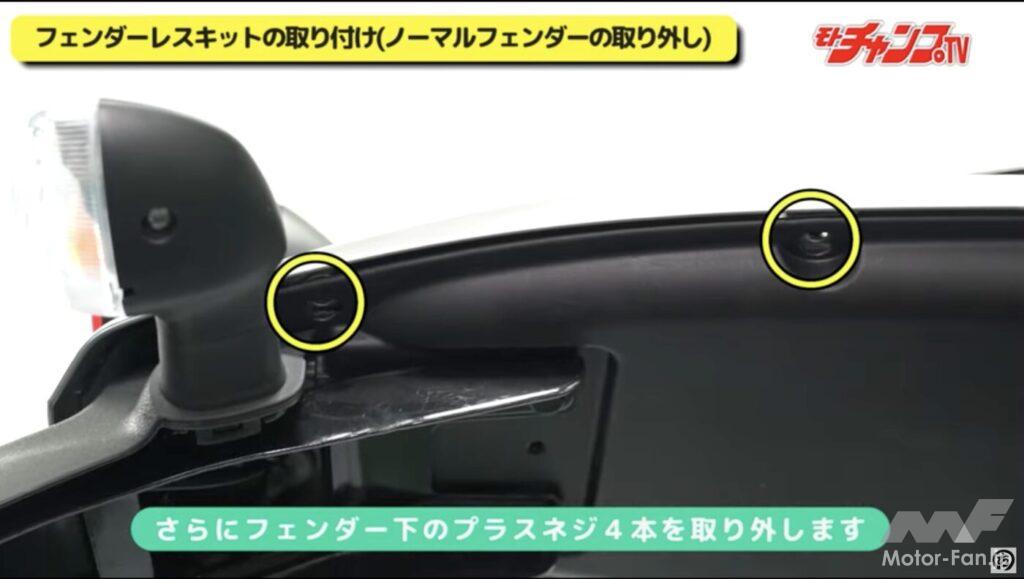
There are also bolts on the underside of the cowling, so remove all four.
The tail cowl is also fixed to the underside of the frame. Remove all four Phillips screws, two on each side.
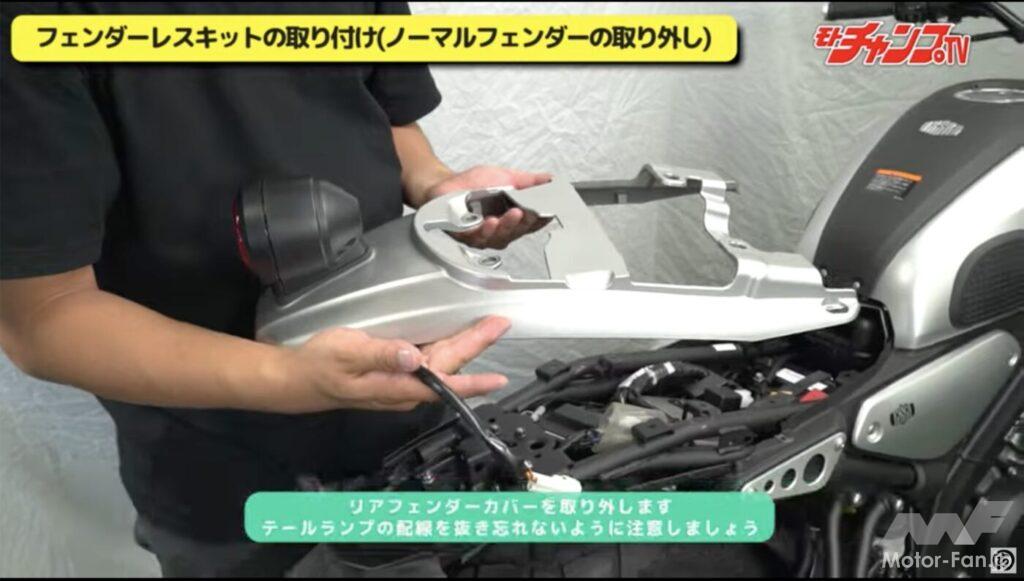
Disconnect the taillight harness and remove the cowl.
Once you have removed the bolts and screws on both the top and bottom, you can lift the cowl. If you leave it as it is, you will not be able to pull it apart because the tail lamp is connected, so follow the tail lamp harness and separate the connector.
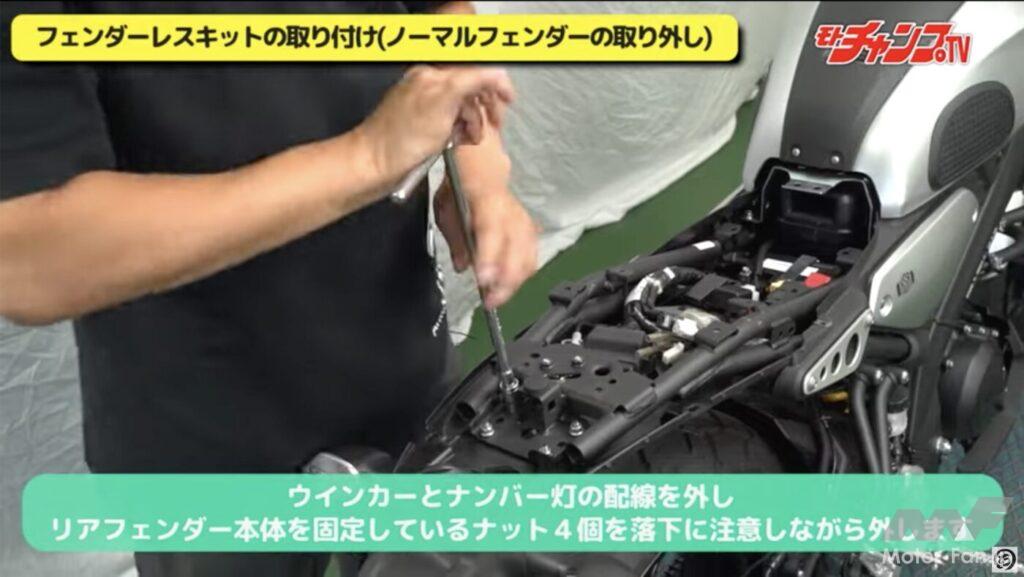
Remove the four nuts holding the original fender in place.
After removing the tail cowl, follow the harnesses for the turn signals and license plate light, disconnecting the connectors for the turn signal wires and the license plate light. Next, disconnect the connection that secures the stock fender. Loosen the four nuts from the top and remove the stock fender from the bottom.
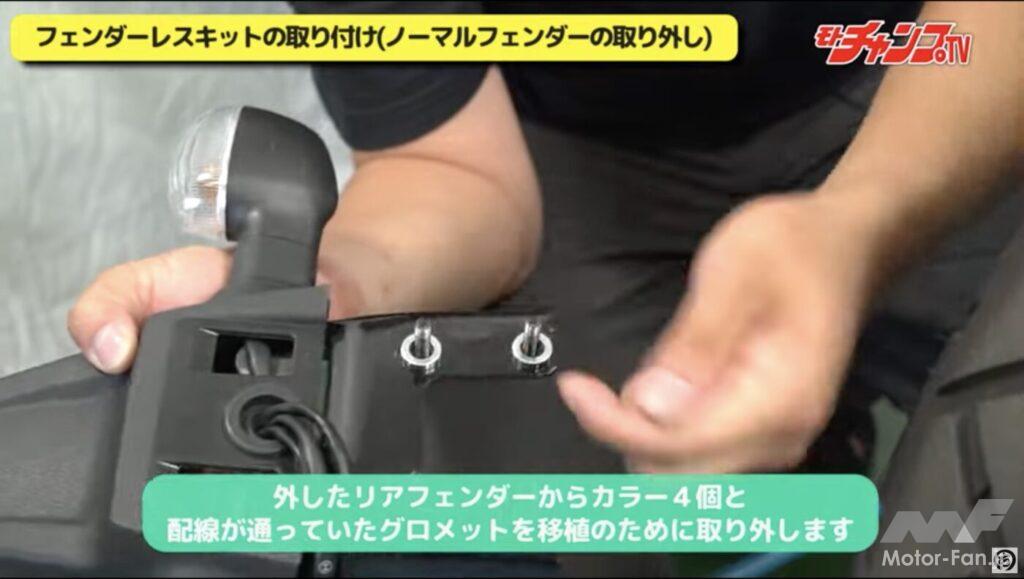
There is a collar on the back of the nut. Be careful not to lose it as it will be reused.
Each bolt coming out of the stock fender has a collar. If you turn it upside down, you may lose the collar, so remove only the collar at this point. These collars will also be used when installing the fender eliminator kit, so be careful not to lose them.
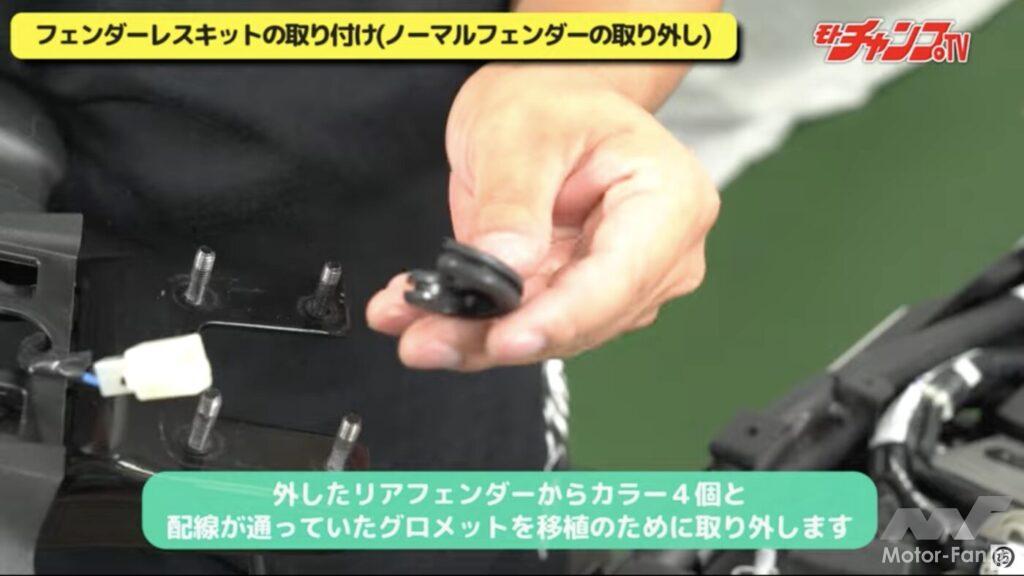
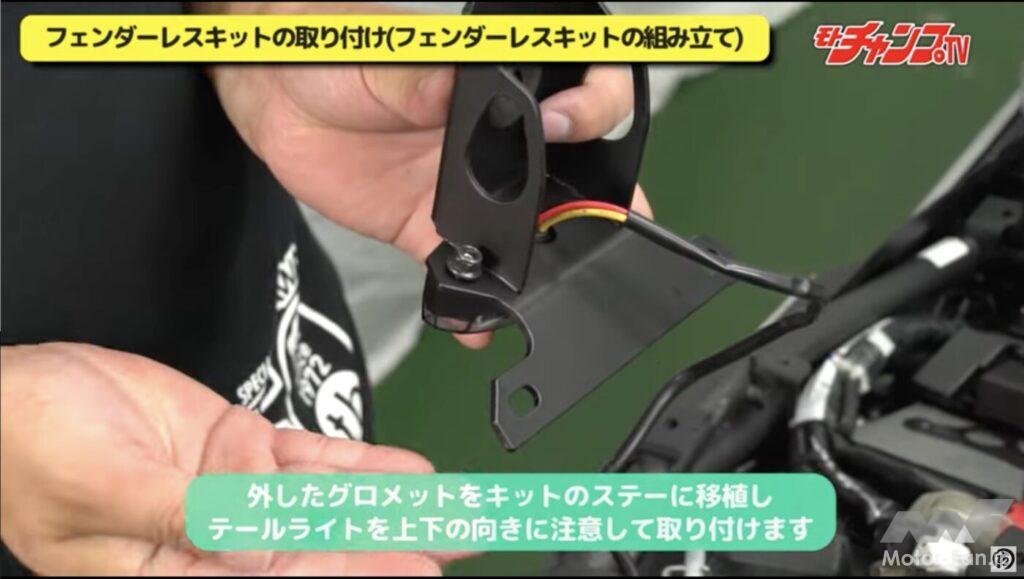
The grommet in the center of the original fender will also be removed as it will be reused.
Next, remove the rubber grommet that is attached to the hole where the harness passed near the center of the removed factory fender. This grommet will also be reused when installing the fender eliminator kit, so be careful not to lose or damage it.
Install a fender eliminator kit and LED turn signals
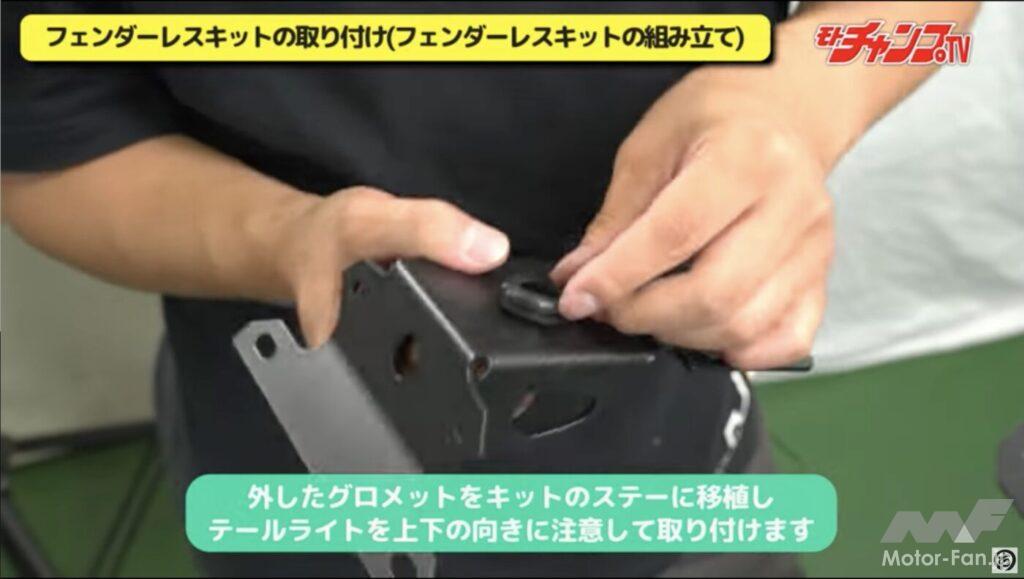
Attach the grommet to the stay included in the kit.
The rubber grommets removed from the factory fenders can be reused for the stays included with the fender eliminator kit. Since the factory fenders are made of resin and the stays included with the kit are metal, make sure to check that the grooves are properly aligned when installing.
Attach the tail lamp to the bracket using the nuts included in the kit.
Attach the LED tail lamp to the bracket included in the kit. In the kit, the LED tail lamp is covered with a nut and two washers, but these nuts are not used when attaching the bracket. Use the self-locking nut included in the kit to secure it to the bracket.

Next, attach the turn signals to the brackets.
Next to the tail lamp, fix the turn signal to the bracket. Make sure the base fits securely into the bracket hole, and then pass the washers and spacers through as instructed.
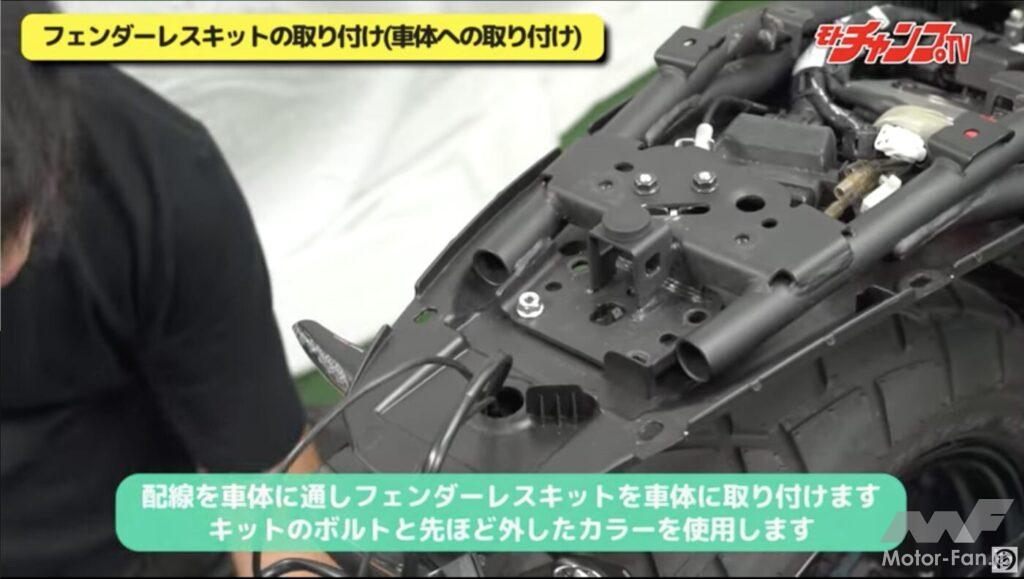
Once the stay is secured to the frame, reconnect the harness and the job is complete.
After setting the tail lamp and blinkers onto the bracket, pull each harness up through the hole in the center. Pass these harnesses through the holes on the frame side and then secure the fender eliminator kit bracket. Once firmly secured, connect the harnesses in the reverse order of disassembly and attach the tail cowl. The hole for the tail lamp that remains in the tail cowl will be covered with a sticker included in the kit.
LED turn signals and fender eliminator kit installed

Front style with LED turn signals.
What do you think? With this, even beginners can easily change their turn signals to LED or install a fender eliminator kit. The manufacturer, SP Takegawa, has developed it so that it can be easily connected using terminals and connectors without any modification to the harness. Also, when you eliminate the fender, the license plate can vibrate due to vibration, but since the bracket is made of metal, there is ample consideration given to vibration.
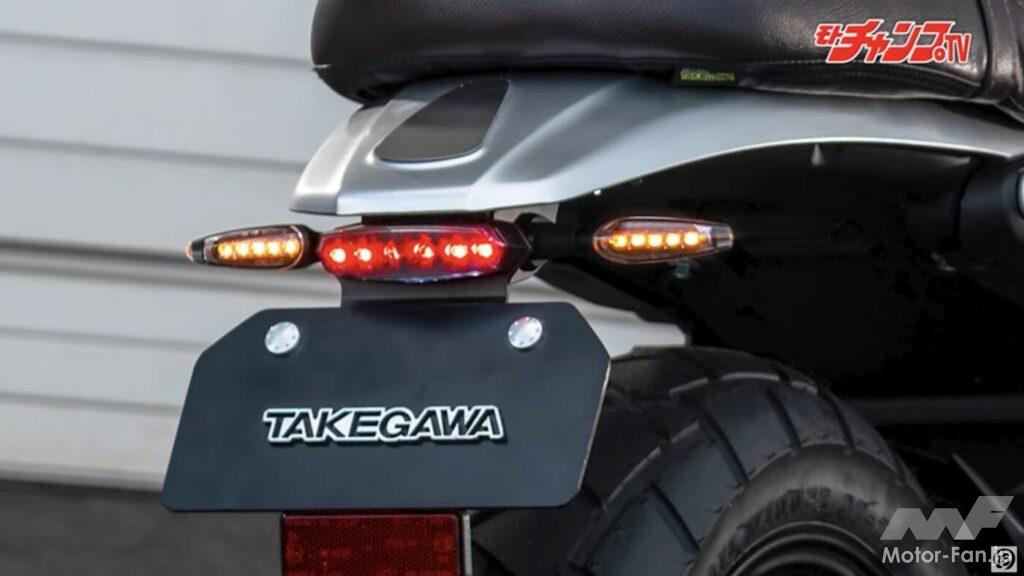
The rear style is fenderless and has LED turn signals.