
Did the LCD screen become dim after parking in the hot sun?

When I parked it in direct sunlight, the LCD display became unreadable.
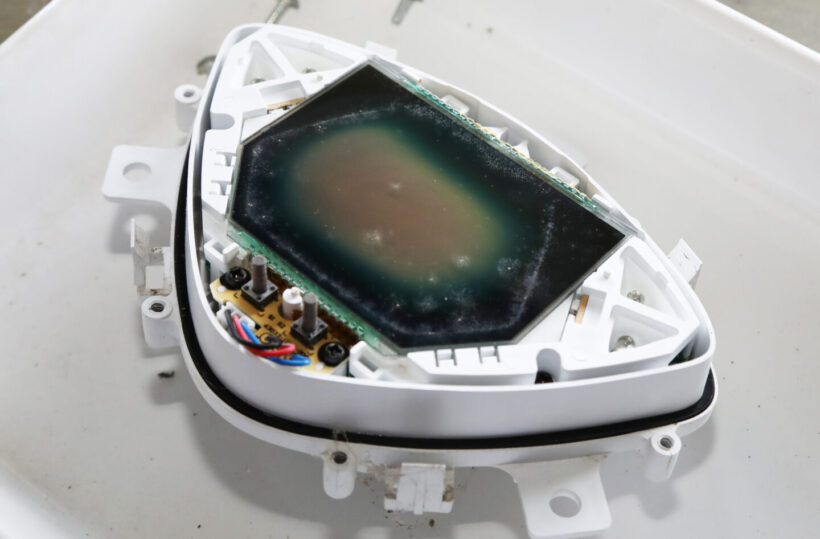
Liquid crystal display (LCD) meter panels have been used on motorcycles since around 2000. Because they are more compact and offer greater design flexibility than analog meters, full LCD meters are becoming more common. However, I’ve recently heard many reports of LCD panels, such as monochrome meters from the 2000s, becoming increasingly difficult to read. My 2013 Taiwanese Yamaha RS-Zero scooter also gradually became increasingly faded, and after leaving it parked in the scorching summer sun for half a day, it became almost unreadable. It appears to be susceptible to UV rays. Since the meter unit is designed to be disassembled and repaired, it must be replaced as a whole. However, since it’s a parallel import, sourcing parts is a bit of a challenge and, above all, expensive, so I wanted to find a way to repair it as cheaply as possible. While used parts are an option for popular models, they’re not widely available in Japan, so I couldn’t find them. So, I decided to attempt a disassembly and repair.
The reason for the thinner screen is the polarizing film

The polarizing film was deteriorating, and direct sunlight seemed to have dealt the final blow.
The structure of an LCD panel is such that a liquid crystal layer sandwiched between two pieces of glass moves when a voltage is applied to the electrodes, changing the light transmittance. Polarizing films are placed above and below the glass panel, allowing only light in a certain direction to pass through the polarizing films. The polarizing films are arranged so that they cross each other at the top and bottom, so when voltage is applied to the liquid crystal layer and the liquid crystal molecules move, that part is displayed in black (or other colors depending on the film). In most cases, the reason the LCD on the meter panel becomes difficult to see is because this polarizing film has deteriorated. My scooter also originally has a black and white inverted LCD, so when the power is turned off, the meter panel should be completely black, but the center part is white. Replacing this film should return the meter panel display to normal.
Disassembling the LCD panel is difficult

Peel off the polarizing film with a scraper, being careful not to scratch the glass.
The polarizing film needed for the repair was available from Amazon. Small sizes can be purchased for under 1,000 yen. I removed the outer plastic cover from the removed meter panel and used a scraper to peel off the upper polarizing film attached to the LCD panel. Some adhesive from the film remained on the panel, so I carefully removed it using a sticker remover. I tried placing a new polarizing film on the LCD panel after removing the film, but the white center remained. The internal film also needed to be replaced. While some meters use silicone rubber to connect the LCD panel to the circuit board, the terminals on the LCD glass panel of this vehicle’s meter are firmly soldered to the circuit board. Removal required desoldering each of the 38 terminals. Because the soldering was neatly applied by machine, the amount of solder was small, making removal difficult. Therefore, I first obtained new solder and used a desoldering tool to remove it. Although I managed to remove the solder, the adhesive holding the legs in place was very strong and difficult to remove, and when I pulled it hard, one of the LCD terminals broke.

Adhesive will remain, so remove it with sticker remover spray.

I tried putting a new polarizing film on it, but there was no change.

Remove the solder from each of the 38 terminals

Apply new solder to make it easier to absorb the solder.

Use a wick to remove solder that cannot be removed with a wick.

The adhesive was so strong that I broke the legs of the LCD panel!

I managed to repair the legs by soldering them.

It took more than two hours to remove it.
Revived with clear, crisp display
Once the LCD panel is finally removed, remove the polarizing film from the back in the same way. Cut and apply a new film in the same way as the original polarizing film. Spray a small amount of water mixed with a mild detergent onto the film, then apply the film and rub it with a rubber spatula to ensure a clean, bubble-free application. After replacing the back side, put the LCD panel back in place and solder the 38 terminals. Next, apply the front side film. If you apply it horizontally, like the back side, it will have white text on a black background, while if you apply it vertically, it will have black text on a white background, so be careful when cutting the film. In this case, I applied the film in the same direction so that the text would be black text on a white background, just like the original. All that’s left to do is reassemble and you’re done. Now the text is clearly readable, even during the day. The manufacturer does not recommend disassembling the unit for repairs. Please do so at your own risk.

Peel off the film on the back and remove the glue

Cut the new film to the same size as the one you removed.

Spray water containing neutral detergent onto the adhesive surface of the film.
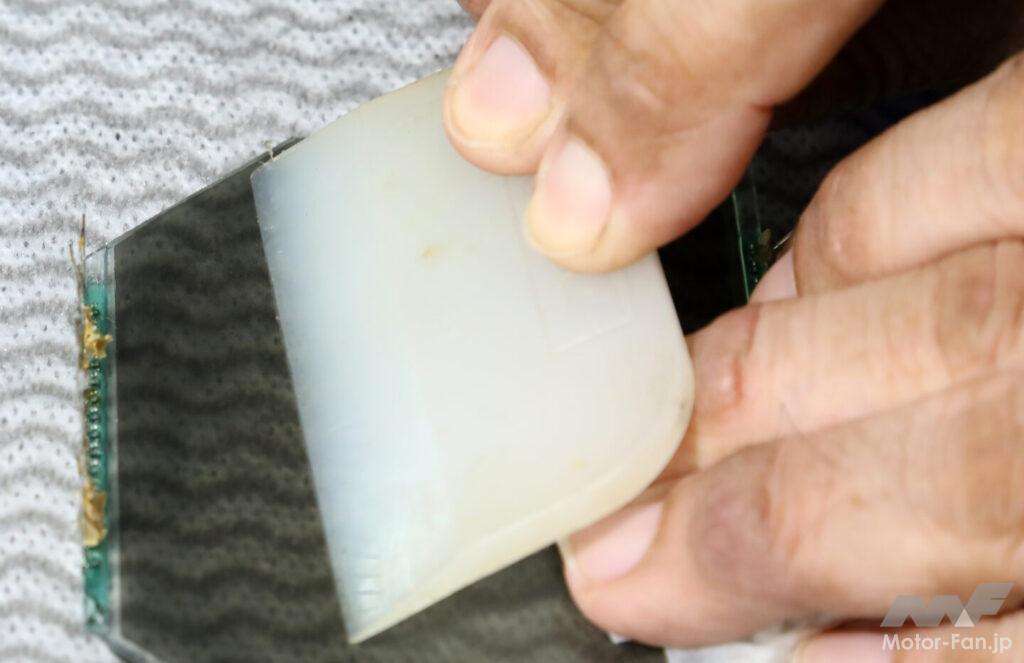
After pasting, use a spatula to push out any water or air bubbles to ensure adhesion.

When polarizing film is applied crosswise, black text appears on a white background.

If you paste it in the same direction, the text will be black with white background.

Finished! I put the indicator film in the wrong direction, so I had to disassemble it again after this.