![Even beginners can easily dress up their bikes! Customize your Cygnus Griffus with KOSO parts! [Video: Moto Champ TV]](https://motopeek.com/wp-content/uploads/2025/08/1860-1760828794610.jpg)


Dress up with KOSO products handled by KN Kikaku.
If you enjoy DIY bike tinkering, we recommend starting with installing some easy-to-use dress-up parts. This is because it’s not particularly difficult to do and doesn’t require many tools, so even beginners can easily give it a try. So, this time we’ve put together a digest of the content introduced in the episode ” Dress up the details to increase the satisfaction of your Cygnus Griffa! “, which is posted on the ” Moto Champ TV ” channel, which distributes free videos on YouTube. Basically, it only requires replacing bolts, nuts, and screws, so we hope you’ll give it a try!
Put on the rear fender!

Remove the battery box cover to remove the inner box under the seat.
First, remove the inner box under the seat to replace not only the rear fender but also the air cleaner box and crankcase cover from the original with KOSO products. When you lift the seat, you can see the exposed bolts, so remove them all. The photo shows the battery case cover.

Once you remove the battery there are two bolts underneath.
Once you remove the cover, you’ll find the battery inside, so remove both the positive and negative harnesses. Then, lift up the battery and you’ll see two bolts on the bottom. Remove both of them. Then you’ll be able to lift up and remove the inner box.

Remove the inner box and remove the air cleaner duct from the throttle body side.
When you remove the inner box, you can see the duct extending from the factory air cleaner connected to the throttle body. Loosen the band on the throttle body side that secures this duct and remove the duct.

Remove the two hoses connected to the air cleaner.
Two breather hoses are connected to the engine from the front and rear of the factory air cleaner. Open the clips and remove both hoses from the engine.

Remove the rear fender without the inner box.
Once you’ve done this, remove all the bolts securing the original rear fender. The rear fender is made of plastic, so you can simply bend it by hand to avoid any obstacles such as rear shocks. Remove the fender itself by sliding it towards the rear of the vehicle.

Remove the collar from the original rear fender and transplant it to a KOSO product.
Remove the two collars from the fixing parts of the removed stock rear fender. This is because these collars will be transplanted and reused on the KOSO carbon look rear fender. Be careful not to lose them in the impact of removing the stock fender. Once transplanted, simply install them in the reverse order of removal.
Replace the crankcase cover!

Remove the plastic cover from the crankcase.
Next, let’s install the KOSO crankcase cover. First, remove the factory air cleaner box, which gets in the way. It’s only secured with two bolts, so it should be easy to remove. Next, remove the plastic cover attached to the factory crankcase cover. Remove the six Phillips screws, but be careful not to strip the threads by using a thin Phillips screwdriver.

After removing the plastic cover, remove the bolt marked with a yellow circle.
Once you remove the plastic cover, the crankcase will be exposed. Remove all 10 bolts circled in yellow in the photo.

Remove the crankcase cover and install the KOSO one.
Once you’ve removed the 10 bolts, carefully remove the crankcase cover, exposing the V-belt and pulleys. If you’re feeling ambitious, this is a good time to tune the drivetrain.

Before attaching the KOSO cover, loosen the yellow circle to lift up the bearing adjustment cover.
Install the KOSO crankcase cover. In the photo, you can see the red gasket underneath the cover. First, place this gasket in between the cover and reuse the bolts to install it. But before that, there’s a thing to note. On the back of the cover, you can see four bolts circled in yellow in the photo. This is the adjustment cover that holds the bearings, so loosen it before tightening the crankcase cover. Tighten the crankcase cover with the 10 bolts, then tighten the four adjustment covers.

After installing the cover, tighten the bearing adjustment cover.
Once the adjustment cover is tightened, the installation of the KOSO crankcase cover is complete. Next, let’s install the KOSO BIG air cleaner box type 1.
Install the BIG air cleaner box type 1!

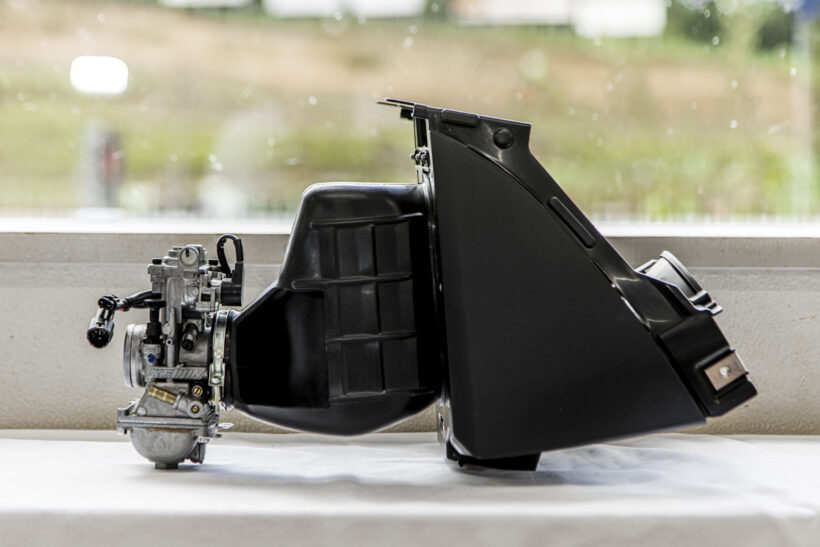
The hoses and bands are transferred from the original box to the KOSO air cleaner box.
Replacing the air cleaner box is relatively easy. First, remove the two breather hoses from the factory air cleaner and transfer them to the KOSO one. Next, attach the band removed from the factory to the duct connecting to the throttle body before starting work.

Install in the reverse order of removal.
The transplanted band connects the OEM throttle body and duct. Then, after connecting the transplanted breather hose to the engine, simply reuse the two OEM bolts that you removed to secure the Big Air Cleaner Box Type 1. The rear breather hose has to pass through a narrow space, so it may be easier to do the job if you have long radio pliers or similar.
Put on the radiator cover!

The radiator cover features an impressive red inlet.
The KOSO radiator cover has a striking carbon fiber look with a red inlet. It can be installed and removed simply by removing the original part and reusing the bolts, making it a customization that anyone can do.

A thin deep socket is required for removal.
However, because the bolt passes through a narrow hole, you will need a thin, long socket to remove it. Be careful, as a regular-sized socket will not fit into the hole.
Install aero cooling leg shields!

A KOSO leg shield is installed under the seat.
The KOSO aero cooling leg shields can be installed simply by removing the cowl under the seat. All you need is a Phillips head screwdriver, so this is another customization suitable for beginners.

Be careful when attaching and detaching as it is secured with not only screws but also claws.
However, even if you remove the Phillips head screw, you cannot remove the cowl as it is. The tabs on the inside are firmly attached, so you need to loosen them before removing it. When attaching it, make sure to firmly attach the tabs before tightening the screws.
Install the carbon look aero grill!

It comes with a KOSO aero grill carbon look.
The KOSO carbon-look aero grill gives your car a bold look. Anyone can install it with just a Phillips head screwdriver, so why not give it a try?

To remove it, use the three bolts under the headlight.
The original cover is secured with three Phillips screws under the headlight. Simply remove it and replace it with the Carbon Look Aero Grill.
Customize your accessories by swapping them out!

The red fender bolt set simply replaces the factory bolts.
ADVERTISEMENT

The KOSO convenience store hook replaces the original with a single hexagonal bolt.

Replace the floorboard bolts with red aluminum floorboard color.
In addition, the car has been dressed up by replacing the original parts with KOSO aluminum fender bolt sets, convenience store hooks, and aluminum floorboard colors. All of these are easy customizations that only require removing and replacing the original parts, but they completely change the overall appearance, making them extremely cost-effective. These are customizations that even beginners can easily do, so why not give it a try as a DIY project?